<span style="font-family: impact, sans-serif; font-size: 18pt;">Topics</span>
<ul>
<li>Specific equipment for travel</li>
<li>Basic repairs</li>
<li>Planning and logistics</li>
<li>Seven Lakes Patagonia Itinerary</li>
</ul>
<span style="font-family: impact, sans-serif; font-size: 18pt;">Specific equipment for travel</span>
<strong>CLOTHING</strong>
The clothing will depend on the place you choose and the time of year, as a general rule we recommend the method of clothing by layers, which will allow you to adapt to the weather changes that will occur and also to the heat that you will generate with your body while pedaling. First layer: moisture management, absorbs sweat from the skin. Second layer: insulation, retains body heat to protect you from the cold. Third layer: protection from wind and rain. Regarding footwear, we recommend you to wear trekking shoes that can be used both for pedaling and walking.
<strong>TEAM</strong>
<ul>
<li><strong>For you: </strong>tent, sleeping bag, insulator, flashlight, kettle, heater (MSR type, gas or similar), two bottles of water, helmet, sunglasses, sunscreen and cocoa cream.</li>
</ul>
<ul>
<li><strong>For the bike:</strong> luggage rack, panniers, pump, lubricant, patches, solution and tire remover.</li>
</ul>
<strong>FOOD</strong>
The food will depend on the itinerary (number of days), it is important during the planning to find out where there are food stores and if they are open during the time of the trip to stock up or if it will be necessary to carry it all from the beginning.
<strong>Some recommendations: </strong>
<ol>
<li>Full <strong>breakfasts</strong> to make your morning run smoothly.</li>
</ol>
Example: coffee or chamomile/boldo tea or your favorite infusion + bread with homemade jam or dulce de leche. Caramelized. Other options: oatmeal, nuts and cinnamon or fruit with cereal, nuts and honey.
<ol>
<li>In the stops you make during the morning or afternoon, you should not miss the <strong>food you need to eat</strong> (cereal bars, nougat, fruits, dried fruits, cereals) <strong>it is convenient to include stops</strong><strong>every hour to eat </strong>. </li>
<li>Ideally, <strong>lunches</strong> should be light, so that you can continue pedaling for the rest of the day. An important fact is that the more you eat, the more blood gets to the stomach and less to the legs, so it is important to make several stops during the day and not two or three with a lot of food. </li>
</ol>
Example: fruits, cheese sandwich, carrot, tomato, avocado and rucula, various salads, tuna.
<ol>
<li>And at <strong>dinner</strong>, eat abundant, carbohydrates are one of the best options.</li>
</ol>
Examples: polenta (with sauce or vegetables), noodles or rice (with sauce or olive oil and grated cheese) and for dessert the inevitable square of dark chocolate before bedtime.
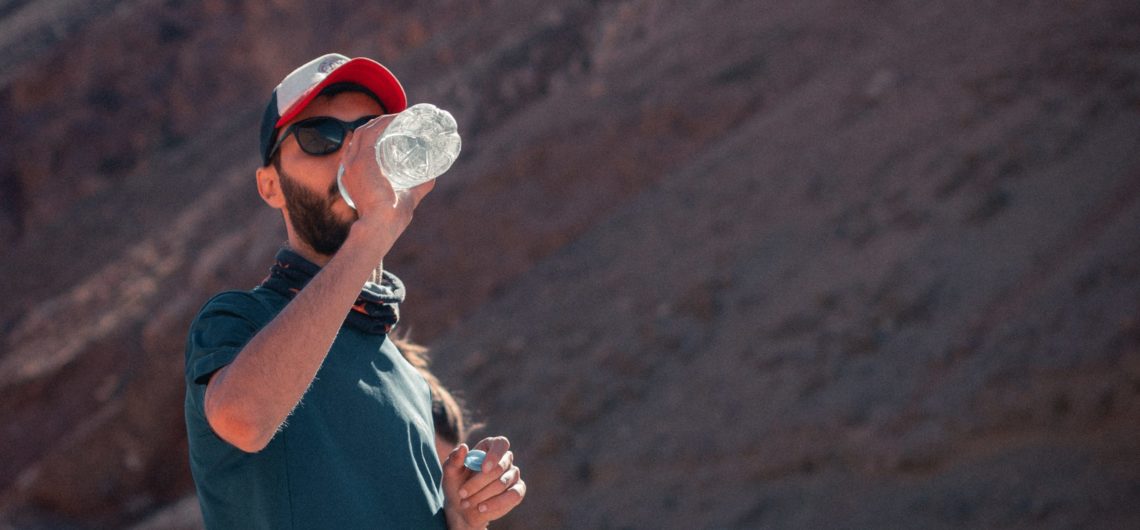
<strong>HYDRATION </strong>
In the same way that we are going to find out the places to stock up on food, we are going to find out if there are rivers, places or towns where we can refill our water bottles along the route we are going to take. Depending on the number of days we will be on the route and how desolate it is, we will think about the liters of water we need to carry. We recommend at least 3 liters of water per day. There are different methods to make water drinkable, some of them are:
<ul>
<li>If the water is cloudy you can wait for it to decant or filter it with a cloth. Then boil it for a few minutes. </li>
<li>If the origin of the water is very doubtful and we can neither filter nor boil it, there is another method that consists of putting the water in a plastic bottle and leaving it in the sun for at least 4 hours (this system is known as SODIS).</li>
<li>Another method is to add 2 drops of bleach or chlorine to 1 liter of water.</li>
<li>There are also water purification tablets, which we recommend to carry in the first aid kit.</li>
</ul>
<strong>HOW CAN WE TELL IF WE ARE WELL HYDRATED?</strong>
By the volume (quantity) and color of urine: if the urine is light in color, we are well hydrated. The darker it is, the less hydration in the body. It is important to be attentive to these symptoms during the trip.
<strong>FIRST AID KIT</strong>
Bring anti-inflammatories, bandages, bandages, hydrogen peroxide and alcohol.
<span style="font-family: impact, sans-serif; font-size: 18pt;">Basic repairs</span>
<strong>WHAT SPARE PARTS TO CARRY FOR THE BICYCLES?</strong>
The minimum and indispensable to solve punctures: patches, solution, tire remover, two spare tubes and a multitool (the basic tool that cyclists should have in their saddlebag). It is also advisable to carry a spare tire.
<span style="font-family: impact, sans-serif; font-size: 18pt;">Planning and logistics </span>
<strong>WHERE TO START</strong>
It is advisable to start by answering these questions: 1) Where would you like to travel to? When? 2) How much time do you have available? 3) Are you going to travel alone or with company? Once you have this information, a research and planning stage begins:
<ul>
<li>The <strong>climate</strong> of the place you want to travel to influences the equipment you will need.</li>
<li>At what <strong>time of the year</strong> it is convenient to go to that place (beyond the weather, the places and routes can be altered by vacations, regional festivities, holidays, etc. This is a very important variable if you are looking for peace of mind and, above all, safety when traveling).</li>
<li><strong>How to get there and how to get back</strong> (You have to analyze all the options and make the best decision possible. Very rarely do we go on a cycling trip pedaling from home and we have no choice but to take a plane, a bus, a train or a boat. This sometimes implies disassembling the bike, packing it well, crossing our fingers so that nothing breaks on the trip, arriving at the destination, putting everything together and then starting to pedal. Once the trip is over, the same steps must be taken for the return trip).</li>
<li>And what are the <strong>possible routes</strong> to build a travel itinerary taking into account all the above points.</li>
</ul>
<strong>HOW DO I CHOOSE A ROUTE?</strong>
This depends on the type of trip you want and can do, as well as your time availability. You can choose a route according to the destination you want to visit or according to the experience you want to live. The recommendation for a first trip is that you choose <strong>routes that transmit confidence and safety</strong> (such as the Seven Lakes route in the province of Neuquén, which has campsites and grocery stores along the way, for example). If it is not your first trip and you want to do something a little more adventurous, there are applications that will help you a lot to choose alternative routes.
<strong>WHICH BIKE SHOULD I CHOOSE? WHAT DOES IT NEED TO HAVE TO BE ABLE TO MAKE A TRIP? </strong>
<strong>The most important thing is not the bike, but your head and your desire to travel.</strong> It is not essential to have the best on the market or the latest technology. To travel by bike you have to go simple: it should be easy and economical to fix it, no matter if you are in a town or in a big city. Ideally, it should be a <strong>mountain bike or a hybrid,</strong> that is, one that combines the best of the road bike - its speed - and the best of the mountain bike - its versatility, since it adapts better to different terrains. To simplify: if you are going to ride on asphalt roads, a hybrid with thin wheels is recommended. If you are going to do a bit of everything, going from asphalt to gravel and from gravel to dirt and from dirt back to asphalt, a hybrid (but this time with wide wheels) can also be a good option. But if you know from the beginning that you are going to ride only on gravel, secondary roads and trails, then a mountain bike with suspension will be the best option.
<strong>WHAT WOULD BE THE IDEAL WEIGHT TO LOAD</strong>
The limit is not to carry too much stuff. Think of it like this: what you carry, what you will have to carry/carry/pedal. The ideal weight is subjective because it depends on each person, the equipment you can get or buy and the type of trip you make. In general terms, the ideal is always to travel as light as possible, carrying everything you need.
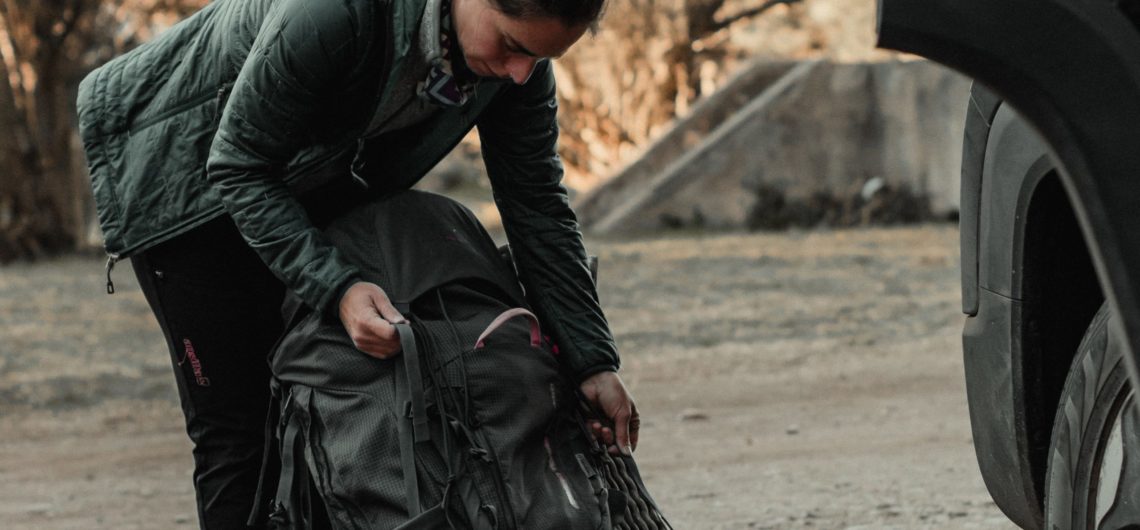
<strong>WHICH SADDLEBAGS TO CHOOSE? HOW TO DISTRIBUTE THE WEIGHT? </strong>
Some national brands that manufacture saddlebags.
<ol>
<li>Halawa</li>
<li>DC BIKE Galván 3551, Villa Urquiza, CABA, Argentina</li>
</ol>
In relation to <strong>weight</strong>, the recommendation is to load the panniers evenly, if one weighs more than the other, you will feel the bike unstable and it will tend to fall to the heavier side. If you are going to use front and rear panniers, the heaviest weight should be in the rear ones and as far back as possible and in the front ones everything that is lighter and we want to have at hand (such as the windbreaker jacket or raincoat), this is because you have to move the handlebars easily: the heavier the load in front, the more difficult it will be to maneuver the bike.
<strong> </strong><strong>SOME TOOLS FOR PLANNING</strong>
<strong>Where to find itineraries for cycling?</strong>
Wikiloc application, a platform where travelers from all over the world upload their routes and share their experiences, information about the road, places to stop, etc. Cicloviajeros: life on the road.
<strong>Where to check the weather conditions?</strong>
<a href="http://www.tiempo.com/">meteored.com</a>, <a href="http://www.accuweather.com/">accuweather.com</a> and <a href="http://www.windguru.cz/es/">windguru.com</a>
<strong>How do I know the elevation gain of the route?</strong>
The most useful and quickest thing to do if you are planning a trip is to use <strong><a href="https://www.google.com.ar/maps">Google Maps</a></strong>. If you want something more specific, we recommend the pages <strong><a href="https://ridewithgps.com/">Ride with GPS</a></strong> y <strong><a href="https://es.wikiloc.com/">Wikiloc</a></strong>. And if you are a craftsman or craftswoman of maps, the best thing to do is to draw the route you are going to do with the <strong><a href="https://www.google.com/intl/es/earth/download/gep/agree.html">Google Earth</a></strong> (for that you have to download the program on your computer) and use the option "View elevation profile". If you are traveling, the most recommended option is to use the application <strong><a href="https://maps.me/">maps.me</a></strong> application, which can be used without data. Another alternative is to carry a GPS.
<strong>BIKE PACKAGING</strong>
In relation to this issue, if we decide to arrive at our point of departure by other means of transportation (bus, train, plane or ship) it is necessary to find out what are the packing requirements for the bicycle or if it can be stored without disassembling it.
<strong>HOW TO CALCULATE THE TIME TO GO FROM ONE POINT TO ANOTHER?</strong>
This will depend on each one, the ideal in a first experience is, before leaving on a trip, to have cycled a few days with all the equipment in the saddlebags, this will allow us to test the weight we are carrying and give us an idea of what will make our trip (obviously without counting the slopes and slopes that may exist in our real itinerary), from this point we can set parameters of how many kilometers to do per day, it is recommended that the first bike trip, is in a place where the distances between each place does not exceed 50 / 60 kilometers. In our personal experience, on a road with slopes (route 40 Patagonia) we did 10km/hour.
<strong> SAFETY MEASURES ON THE ROAD</strong>
<strong>Ride with reflective bibs</strong> in heavy traffic or on foggy or rainy days. <strong>Add a rear-view mirror to your bicycle</strong> (check if it is well placed because sometimes with vibration it can come loose and in those cases it is convenient to secure it with tape and/or seals). Using the mirror you can see what is happening with the traffic behind you without having to turn your head, which is key when you are on the road with a lot of traffic. <strong>Wear a helmet </strong>(many people find it annoying but it is a very important safety measure. Besides, in sunny places, it is a very good protection to avoid heat stroke).
<strong>Always pedal on the white line. </strong>In cases where you see a car in front and another one behind, the best thing to do is to go to the side of the road. If you can continue pedaling, great, and if not, brake and wait for the cars to pass. When <strong>riding with another person</strong>, the distances between one and the other should not be too big, always one behind the other, NEVER IN PARALLEL. Never be overconfident: <strong>use all your senses when pedaling on the road</strong>. Avoid using headphones since your ears are your best allies.
<strong>Do not exceed speed on steep descents. </strong>The adventure can be a lot of fun, but a bike loaded at more than 50 km/h is not very maneuverable and a hard hit can end your trip.
<strong>When there are bike paths, use them. When there are paved shoulders, use them too. </strong> ALWAYS, WITHOUT EXCEPTION.
<span style="font-family: impact, sans-serif; font-size: 18pt;">SEVEN LAKES PATAGONIA ITINERARY</span>
<strong>1 Los Siete Lagos - difficulty level: low/medium (combines asphalt, long climbs and fun descents). </strong>
The road that joins Villa La Angostura with San Martín de los Andes is one of the most classic two-wheeled routes, with a low level of difficulty, in Argentina and one of the most recommended to start cycling, since it is a stretch that is prepared to receive cyclists: it has restaurants, inns, organized and wild camping sites during the high season (from December to March). There are 108 km along Route 40, recently paved in its entirety. In addition to lakes Espejo, Correntoso, Villarino, Falkner (where you can camp on the shore), Hermoso, Machónico and Lácar (the famous seven) there are many other hidden water mirrors, which are not visible to the naked eye and from the road, but are easily accessible by bicycle. Along this route you will cycle through the Nahuel Huapi and Lanín National Parks. You can start from either Villa La Angostura or San Martín de los Andes, although the first option (from South to North) is usually recommended because there are fewer climbs. The estimated time to cover all this road, pedaling between 20 and 27 km per day, stopping at the lakes and going at a leisurely pace, is<strong> five to six days</strong>. The best time to ride it is in <strong>October, November, December and March.</strong> It is important to check the weather conditions at <a href="http://www.tiempo.com/">meteored.com</a>, <a href="http://www.accuweather.com/">accuweather.com</a> and <a href="http://www.windguru.cz/es/">windguru.com</a> before the trip for better accuracy. We do not recommend traveling in high season (January and February) due to the large amount of traffic during the summer vacation months, nor during the winter since temperatures are above freezing and the road is covered with snow. <strong>The return:</strong> if you want to return by bus from San Martín de los Andes to Villa La Angostura once the trip is over, you can take a bus from the <a href="http://www.albus.com.ar/">Albus</a> company <a href="http://www.albus.com.ar/">.</a>
Topics
- Specific equipment for travel
- Basic repairs
- Planning and logistics
- Seven Lakes Patagonia Itinerary
Specific equipment for travel
CLOTHING
The clothing will depend on the place you choose and the time of year, as a general rule we recommend the method of clothing by layers, which will allow you to adapt to the weather changes that will occur and also to the heat that you will generate with your body while pedaling. First layer: moisture management, absorbs sweat from the skin. Second layer: insulation, retains body heat to protect you from the cold. Third layer: protection from wind and rain. Regarding footwear, we recommend you to wear trekking shoes that can be used both for pedaling and walking.
TEAM
- For you: tent, sleeping bag, insulator, flashlight, kettle, heater (MSR type, gas or similar), two bottles of water, helmet, sunglasses, sunscreen and cocoa cream.
- For the bike: luggage rack, panniers, pump, lubricant, patches, solution and tire remover.
FOOD
The food will depend on the itinerary (number of days), it is important during the planning to find out where there are food stores and if they are open during the time of the trip to stock up or if it will be necessary to carry it all from the beginning.
Some recommendations:
- Full breakfasts to make your morning run smoothly.
Example: coffee or chamomile/boldo tea or your favorite infusion + bread with homemade jam or dulce de leche. Caramelized. Other options: oatmeal, nuts and cinnamon or fruit with cereal, nuts and honey.
- In the stops you make during the morning or afternoon, you should not miss the food you need to eat (cereal bars, nougat, fruits, dried fruits, cereals) it is convenient to include stopsevery hour to eat .
- Ideally, lunches should be light, so that you can continue pedaling for the rest of the day. An important fact is that the more you eat, the more blood gets to the stomach and less to the legs, so it is important to make several stops during the day and not two or three with a lot of food.
Example: fruits, cheese sandwich, carrot, tomato, avocado and rucula, various salads, tuna.
- And at dinner, eat abundant, carbohydrates are one of the best options.
Examples: polenta (with sauce or vegetables), noodles or rice (with sauce or olive oil and grated cheese) and for dessert the inevitable square of dark chocolate before bedtime.
HYDRATION
In the same way that we are going to find out the places to stock up on food, we are going to find out if there are rivers, places or towns where we can refill our water bottles along the route we are going to take. Depending on the number of days we will be on the route and how desolate it is, we will think about the liters of water we need to carry. We recommend at least 3 liters of water per day. There are different methods to make water drinkable, some of them are:
- If the water is cloudy you can wait for it to decant or filter it with a cloth. Then boil it for a few minutes.
- If the origin of the water is very doubtful and we can neither filter nor boil it, there is another method that consists of putting the water in a plastic bottle and leaving it in the sun for at least 4 hours (this system is known as SODIS).
- Another method is to add 2 drops of bleach or chlorine to 1 liter of water.
- There are also water purification tablets, which we recommend to carry in the first aid kit.
HOW CAN WE TELL IF WE ARE WELL HYDRATED?
By the volume (quantity) and color of urine: if the urine is light in color, we are well hydrated. The darker it is, the less hydration in the body. It is important to be attentive to these symptoms during the trip.
FIRST AID KIT
Bring anti-inflammatories, bandages, bandages, hydrogen peroxide and alcohol.
Basic repairs
WHAT SPARE PARTS TO CARRY FOR THE BICYCLES?
The minimum and indispensable to solve punctures: patches, solution, tire remover, two spare tubes and a multitool (the basic tool that cyclists should have in their saddlebag). It is also advisable to carry a spare tire.
Planning and logistics
WHERE TO START
It is advisable to start by answering these questions: 1) Where would you like to travel to? When? 2) How much time do you have available? 3) Are you going to travel alone or with company? Once you have this information, a research and planning stage begins:
- The climate of the place you want to travel to influences the equipment you will need.
- At what time of the year it is convenient to go to that place (beyond the weather, the places and routes can be altered by vacations, regional festivities, holidays, etc. This is a very important variable if you are looking for peace of mind and, above all, safety when traveling).
- How to get there and how to get back (You have to analyze all the options and make the best decision possible. Very rarely do we go on a cycling trip pedaling from home and we have no choice but to take a plane, a bus, a train or a boat. This sometimes implies disassembling the bike, packing it well, crossing our fingers so that nothing breaks on the trip, arriving at the destination, putting everything together and then starting to pedal. Once the trip is over, the same steps must be taken for the return trip).
- And what are the possible routes to build a travel itinerary taking into account all the above points.
HOW DO I CHOOSE A ROUTE?
This depends on the type of trip you want and can do, as well as your time availability. You can choose a route according to the destination you want to visit or according to the experience you want to live. The recommendation for a first trip is that you choose routes that transmit confidence and safety (such as the Seven Lakes route in the province of Neuquén, which has campsites and grocery stores along the way, for example). If it is not your first trip and you want to do something a little more adventurous, there are applications that will help you a lot to choose alternative routes.
WHICH BIKE SHOULD I CHOOSE? WHAT DOES IT NEED TO HAVE TO BE ABLE TO MAKE A TRIP?
The most important thing is not the bike, but your head and your desire to travel. It is not essential to have the best on the market or the latest technology. To travel by bike you have to go simple: it should be easy and economical to fix it, no matter if you are in a town or in a big city. Ideally, it should be a mountain bike or a hybrid, that is, one that combines the best of the road bike – its speed – and the best of the mountain bike – its versatility, since it adapts better to different terrains. To simplify: if you are going to ride on asphalt roads, a hybrid with thin wheels is recommended. If you are going to do a bit of everything, going from asphalt to gravel and from gravel to dirt and from dirt back to asphalt, a hybrid (but this time with wide wheels) can also be a good option. But if you know from the beginning that you are going to ride only on gravel, secondary roads and trails, then a mountain bike with suspension will be the best option.
WHAT WOULD BE THE IDEAL WEIGHT TO LOAD
The limit is not to carry too much stuff. Think of it like this: what you carry, what you will have to carry/carry/pedal. The ideal weight is subjective because it depends on each person, the equipment you can get or buy and the type of trip you make. In general terms, the ideal is always to travel as light as possible, carrying everything you need.
WHICH SADDLEBAGS TO CHOOSE? HOW TO DISTRIBUTE THE WEIGHT?
Some national brands that manufacture saddlebags.
- Halawa
- DC BIKE Galván 3551, Villa Urquiza, CABA, Argentina
In relation to weight, the recommendation is to load the panniers evenly, if one weighs more than the other, you will feel the bike unstable and it will tend to fall to the heavier side. If you are going to use front and rear panniers, the heaviest weight should be in the rear ones and as far back as possible and in the front ones everything that is lighter and we want to have at hand (such as the windbreaker jacket or raincoat), this is because you have to move the handlebars easily: the heavier the load in front, the more difficult it will be to maneuver the bike.
SOME TOOLS FOR PLANNING
Where to find itineraries for cycling?
Wikiloc application, a platform where travelers from all over the world upload their routes and share their experiences, information about the road, places to stop, etc. Cicloviajeros: life on the road.
Where to check the weather conditions?
meteored.com, accuweather.com and windguru.com
How do I know the elevation gain of the route?
The most useful and quickest thing to do if you are planning a trip is to use Google Maps. If you want something more specific, we recommend the pages Ride with GPS y Wikiloc. And if you are a craftsman or craftswoman of maps, the best thing to do is to draw the route you are going to do with the Google Earth (for that you have to download the program on your computer) and use the option “View elevation profile”. If you are traveling, the most recommended option is to use the application maps.me application, which can be used without data. Another alternative is to carry a GPS.
BIKE PACKAGING
In relation to this issue, if we decide to arrive at our point of departure by other means of transportation (bus, train, plane or ship) it is necessary to find out what are the packing requirements for the bicycle or if it can be stored without disassembling it.
HOW TO CALCULATE THE TIME TO GO FROM ONE POINT TO ANOTHER?
This will depend on each one, the ideal in a first experience is, before leaving on a trip, to have cycled a few days with all the equipment in the saddlebags, this will allow us to test the weight we are carrying and give us an idea of what will make our trip (obviously without counting the slopes and slopes that may exist in our real itinerary), from this point we can set parameters of how many kilometers to do per day, it is recommended that the first bike trip, is in a place where the distances between each place does not exceed 50 / 60 kilometers. In our personal experience, on a road with slopes (route 40 Patagonia) we did 10km/hour.
SAFETY MEASURES ON THE ROAD
Ride with reflective bibs in heavy traffic or on foggy or rainy days. Add a rear-view mirror to your bicycle (check if it is well placed because sometimes with vibration it can come loose and in those cases it is convenient to secure it with tape and/or seals). Using the mirror you can see what is happening with the traffic behind you without having to turn your head, which is key when you are on the road with a lot of traffic. Wear a helmet (many people find it annoying but it is a very important safety measure. Besides, in sunny places, it is a very good protection to avoid heat stroke).
Always pedal on the white line. In cases where you see a car in front and another one behind, the best thing to do is to go to the side of the road. If you can continue pedaling, great, and if not, brake and wait for the cars to pass. When riding with another person, the distances between one and the other should not be too big, always one behind the other, NEVER IN PARALLEL. Never be overconfident: use all your senses when pedaling on the road. Avoid using headphones since your ears are your best allies.
Do not exceed speed on steep descents. The adventure can be a lot of fun, but a bike loaded at more than 50 km/h is not very maneuverable and a hard hit can end your trip.
When there are bike paths, use them. When there are paved shoulders, use them too. ALWAYS, WITHOUT EXCEPTION.
SEVEN LAKES PATAGONIA ITINERARY
1 Los Siete Lagos – difficulty level: low/medium (combines asphalt, long climbs and fun descents).
The road that joins Villa La Angostura with San Martín de los Andes is one of the most classic two-wheeled routes, with a low level of difficulty, in Argentina and one of the most recommended to start cycling, since it is a stretch that is prepared to receive cyclists: it has restaurants, inns, organized and wild camping sites during the high season (from December to March). There are 108 km along Route 40, recently paved in its entirety. In addition to lakes Espejo, Correntoso, Villarino, Falkner (where you can camp on the shore), Hermoso, Machónico and Lácar (the famous seven) there are many other hidden water mirrors, which are not visible to the naked eye and from the road, but are easily accessible by bicycle. Along this route you will cycle through the Nahuel Huapi and Lanín National Parks. You can start from either Villa La Angostura or San Martín de los Andes, although the first option (from South to North) is usually recommended because there are fewer climbs. The estimated time to cover all this road, pedaling between 20 and 27 km per day, stopping at the lakes and going at a leisurely pace, is five to six days. The best time to ride it is in October, November, December and March. It is important to check the weather conditions at meteored.com, accuweather.com and windguru.com before the trip for better accuracy. We do not recommend traveling in high season (January and February) due to the large amount of traffic during the summer vacation months, nor during the winter since temperatures are above freezing and the road is covered with snow. The return: if you want to return by bus from San Martín de los Andes to Villa La Angostura once the trip is over, you can take a bus from the Albus company .