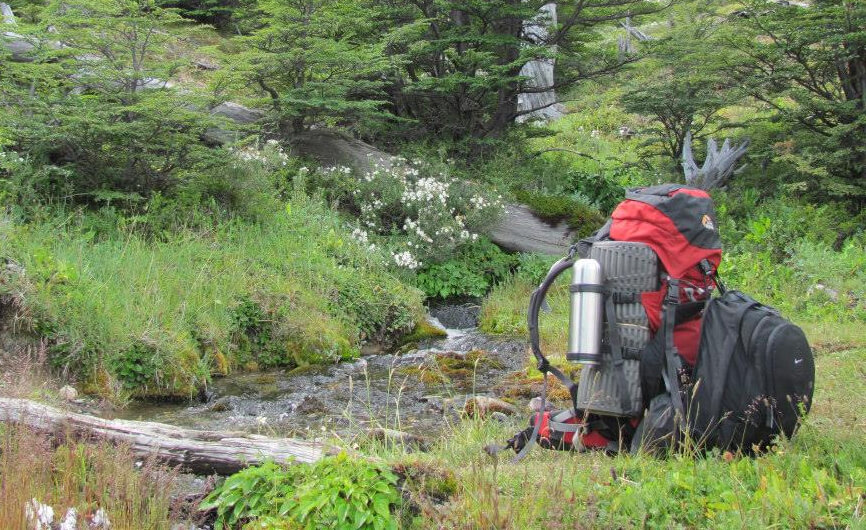
<span style="font-weight: 400;">If you spend any time outdoors, you've probably heard the phrase </span><b><i>"leave no trace'' .</i></b><span style="font-weight: 400;">. But what does this mean? It's all about so-called </span><b>low-impact practices</b><span style="font-weight: 400;">practices, which allow us to </span><b>to enjoy and protect our natural spaces</b><span style="font-weight: 400;">.</span>
<span style="font-weight: 400;">During 2019, a total of 4.3 million visitors were recorded in Argentina's National Parks (NP). Year after year, our love of the outdoors takes its toll on nature: </span><b>impacted areas</b> <b>with litter, invasive species, habituated wildlife, trail erosion, polluted water sources</b><span style="font-weight: 400;"> and more. While those of us who participate in these activities have no intention of harming the natural environment, we may not have the knowledge to preserve it either. </span>
<span style="font-weight: 400;">The </span><b>Seven Principles</b><span style="font-weight: 400;"> from </span><b>"Leave No Trace"</b><span style="font-weight: 400;"> (© 1999 by the Leave No Trace Center for Outdoor Ethics: www.LNT.org), provide an easy-to-understand framework of minimum impact practices. </span><b>minimal impact practices</b><span style="font-weight: 400;">for everyone who goes out into nature. These principles can be applied anywhere, from remote wilderness areas to local parks and squares and even in your own backyard. In other words, they apply to almost every </span><b>outdoor recreational activities</b><span style="font-weight: 400;">. Cada principio cubre un tema específico y brinda información detallada para minimizar nuestro impacto. </span>
<ol>
<li aria-level="1"><span style="font-weight: 400;">Plan ahead and be prepared.</span></li>
<li aria-level="1"><span style="font-weight: 400;">Walk and camp on resistant surfaces.</span></li>
<li aria-level="1"><span style="font-weight: 400;">Dispose of waste and garbage properly.</span></li>
<li aria-level="1"><span style="font-weight: 400;">Leave what you find, do not take anything "as a souvenir".</span></li>
<li aria-level="1"><span style="font-weight: 400;">Minimize the impact of fire.</span></li>
<li aria-level="1"><span style="font-weight: 400;">Respect wildlife.</span></li>
<li aria-level="1">Be considerate of other people.</li>
<li style="list-style-type: none;">
</li></ol>
<h2><strong>Plan ahead and be prepared</strong></h2>
<span style="font-weight: 400;">This applies on several levels: if you are not well prepared, you are more likely to have problems. Lack of planning can lead to situations of fatigue or fear, forcing you to make bad decisions. </span><b>Planning ahead</b><span style="font-weight: 400;">including </span><b>researching the destination</b><span style="font-weight: 400;"> y </span><b>packing accordingly.</b><span style="font-weight: 400;">.</span>
<ul>
<li style="font-weight: 400;" aria-level="1"><b>Research the regulations, environmental</b><span style="font-weight: 400;">environmental particularities and risks of the area to be traveled.</span></li>
<li style="font-weight: 400;" aria-level="1"><b>Schedule your trip</b><span style="font-weight: 400;">avoiding the busiest times of the year.</span></li>
<li style="font-weight: 400;" aria-level="1"><b>I went out in small groups</b><span style="font-weight: 400;">. Si no fuera posible, una alternativa es subdividir los grupos. </span></li>
<li style="font-weight: 400;" aria-level="1"><b>Repackage food to minimize</b><span style="font-weight: 400;"> to minimize waste.</span></li>
<li style="font-weight: 400;" aria-level="1"><b>Be prepared for</b> <b>extreme weather conditions</b><span style="font-weight: 400;">hazards and emergencies.</span></li>
<li style="font-weight: 400;" aria-level="1"><b>Use</b> <b>GPS</b><span style="font-weight: 400;"> or navigate with chart and compass, to eradicate the use of marking paint, rock piles or others.</span></li>
</ul>
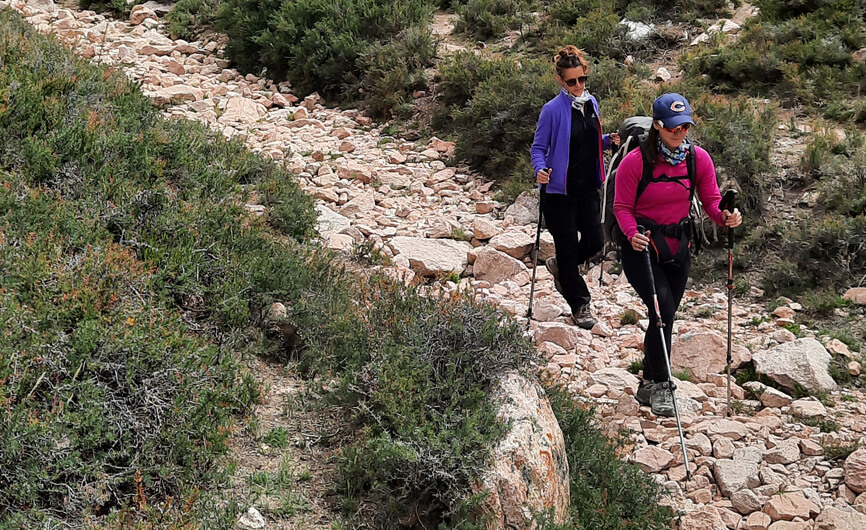
<h2><strong>Walk and camp on resistant surfaces</strong></h2>
<span style="font-weight: 400;">When you're exploring, preparing for a picnic or setting up camp, look for types of hardy </span><b>hardy terrain</b><span style="font-weight: 400;">. Las superficies ideales incluyen </span><b>established trails and campsites</b><span style="font-weight: 400;">. También </span><b>rock, gravel, dry grass or snow</b><span style="font-weight: 400;">.</span>
<h3>In transited areas:</h3>
<ul>
<li style="font-weight: 400;" aria-level="1"><span style="font-weight: 400;">Use the existing </span><b>existing trails and campsites</b><span style="font-weight: 400;">.</span></li>
<li style="font-weight: 400;" aria-level="1"><span style="font-weight: 400;">Camp at least </span><b>60 m from lakes and streams</b><span style="font-weight: 400;">.</span></li>
<li style="font-weight: 400;" aria-level="1"><span style="font-weight: 400;">Arma </span><b>kids camps</b><span style="font-weight: 400;">. Concentrá la actividad en áreas donde no haya vegetación. </span></li>
<li style="font-weight: 400;" aria-level="1"><span style="font-weight: 400;">Walk in </span><b>single file in the middle of the trail</b><span style="font-weight: 400;">even when it is wet or muddy.</span></li>
</ul>
<h3>In pristine (virgin) areas<span style="font-weight: 400;">:</span></h3>
<ul>
<li style="font-weight: 400;" aria-level="1"><span style="font-weight: 400;">Disperse the use of the area to avoid </span><b>avoid the generation of</b> <b>campgrounds and trails.</b><span style="font-weight: 400;">.</span></li>
<li style="font-weight: 400;" aria-level="1"><span style="font-weight: 400;">Avoid places where the impact has just begun.</span></li>
</ul>
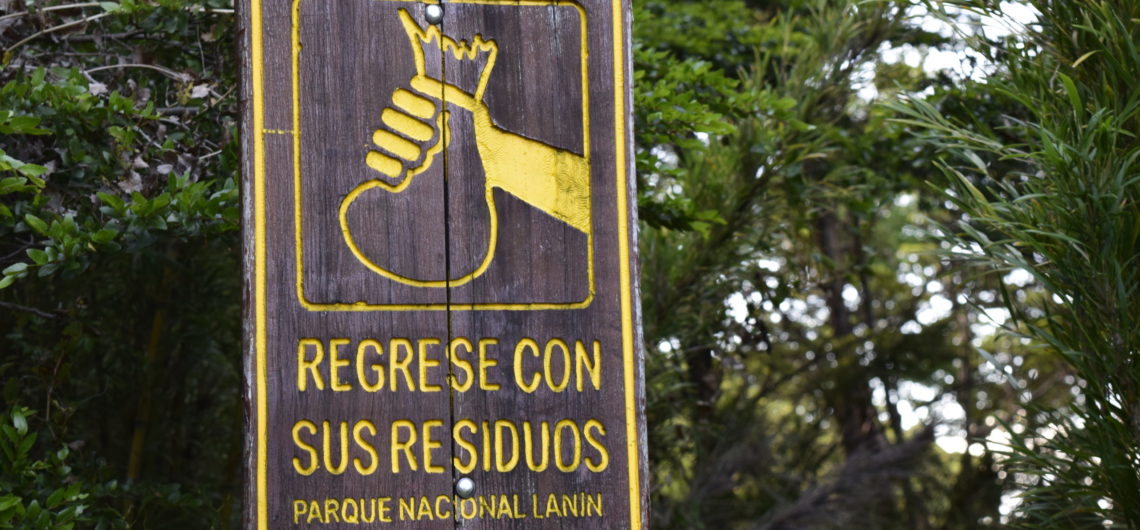
<h2><strong>Proper disposal of waste and garbage</strong></h2>
<b>This principle applies to</b> <b>applies to everything</b><span style="font-weight: 400;">from toilet paper and wet wipes, to human waste, to rinse water when brushing your teeth, to garbage in general.</span>
<ul>
<li style="font-weight: 400;" aria-level="1"><b>If it came with you, it comes back with you</b><span style="font-weight: 400;">. Inspeccioná el campamento y área de baño en busca de basura o alimentos derramados. Embolsá toda la basura (restos de comida, envoltorios, papeles, etc) y bajalos con vos. Dejá siempre el lugar más limpio de lo que lo encontraste. </span></li>
<li style="font-weight: 400;" aria-level="1"><span style="font-weight: 400;">For the poop 💩, </span><span style="font-weight: 400;">you should have a small shovel to be able to make holes 15 to 20 cm deep and bury solid waste in the </span><b>and bury the solid waste</b><span style="font-weight: 400;"> (the paper/wipes with which we clean ourselves, go down with you), at least 60 m from the water, camp and </span><b>60 m from the water, camp and trails.</b><span style="font-weight: 400;">. Al terminar, rellená y cubrí con la cobertura de suelo original. En algunas áreas naturales muy afectadas o campamentos de altura, como por ejemplo en el Parque Provincial Cordón del Plata, se requiere incluso que bajemos los desechos humanos: para ésto, es altamente recomendado el uso del </span><a href="https://www.huka.com.ar/en/instruction-to-assemble-your-caca-tubo/"><span style="font-weight: 400;">Poop-Tube</span></a><span style="font-weight: 400;">.</span></li>
<li style="font-weight: 400;" aria-level="1"><span style="font-weight: 400;">Toilet paper, wet wipes and other personal hygiene items, </span><b>you should bring them with you</b><span style="font-weight: 400;">. Para esto, es indispensable contar con una pequeña bolsa para los residuos personales. </span></li>
<li style="font-weight: 400;" aria-level="1"><span style="font-weight: 400;">To rinse your body or wash the dishes, you have to transport the necessary </span><b>carry the necessary water 60 m away from the cause</b><span style="font-weight: 400;">. Para lavar vajilla, se recomienda el uso de piedras pequeñas u arena. Si usamos productos, deben ser biodegradables y en muy pequeñas cantidades. Al lavar platos, esparcí el agua </span><i><span style="font-weight: 400;">"dirty"</span></i><span style="font-weight: 400;"> after rinsing. A good alternative, for places where you arrive by car, is to use a bucket for all the above mentioned tasks. </span></li>
</ul>
<h2><strong>Leave what you find, do not take anything "as a souvenir".</strong></h2>
<span style="font-weight: 400;">Another phrase you must have heard if you come out into nature is: </span><b><i>"take only pictures, leave only footprints".</i></b><span style="font-weight: 400;">which is valid, although not even leaving footprints is even better.</span>
<ul>
<li style="font-weight: 400;" aria-level="1"><b>Preserve the past</b><span style="font-weight: 400;">In countless itineraries (especially in northern Argentina) it is possible to find cultural or historical structures and artifacts. They can be examined, but not touched or intervened. </span></li>
<li style="font-weight: 400;" aria-level="1"><b>Dejá</b> <b>stones, plants and other natural objects</b><span style="font-weight: 400;"> as you find them.</span></li>
<li style="font-weight: 400;" aria-level="1"><b>Avoid introducing or transporting non-native species.</b><span style="font-weight: 400;">. También es necesario limpiar las suelas del calzado, los cascos de los kayak y los neumáticos de las bicis entre viajes. </span></li>
<li style="font-weight: 400;" aria-level="1"><b>Do not build structures</b><span style="font-weight: 400;">furniture or ditches.</span></li>
</ul>
<h2><strong>Minimize the impact of fire</strong></h2>
<span style="font-weight: 400;">The campfire is a timeless camping ritual, but it is also the most destructive of rituals.</span><b> The best option is</b> <b>not to build a fire</b><span style="font-weight: 400;">There are light heaters for cooking and lanterns for light. </span><b>Stargazing</b><span style="font-weight: 400;"> is an excellent nighttime activity and is best enjoyed in total darkness.</span>
<ul>
<li style="font-weight: 400;" aria-level="1"><span style="font-weight: 400;">Where permitted, </span><b>use</b> <b>existing and/or permitted fireplaces</b><span style="font-weight: 400;">.</span></li>
<li style="font-weight: 400;" aria-level="1"><span style="font-weight: 400;">The fire should be small.</span></li>
<li style="font-weight: 400;" aria-level="1"><b>Only</b> <b>can only feed on</b> <b>sticks and fallen branches</b><span style="font-weight: 400;">. Tomá solo aquellas que puedas romper con las manos. </span></li>
<li style="font-weight: 400;" aria-level="1"><b>Do not take firewood from elsewhere</b><span style="font-weight: 400;">as it may introduce pests or diseases. If you are going to buy it, buy it from a local source. </span></li>
<li style="font-weight: 400;" aria-level="1"><span style="font-weight: 400;">Burn all the wood and charcoal to ashes. </span><b>Extinguish the fire</b> <b>completely</b><span style="font-weight: 400;">.</span></li>
</ul>
<h2><strong>Respect wildlife</strong></h2>
<b>Do not approach animals</b><span style="font-weight: 400;">. La mejor forma de contemplar la vida que nos rodea y disfrutar de los encuentros casuales con animales, es a través del zoom de nuestras cámaras o de un par de binoculares. </span>
<ul>
<li style="font-weight: 400;" aria-level="1"><span style="font-weight: 400;">Observe wildlife from a distance. </span><b>Do not follow the animals</b><span style="font-weight: 400;"> or get close to them.</span></li>
<li style="font-weight: 400;" aria-level="1"><b>Never feed the animals</b><span style="font-weight: 400;">. Alimentar a la vida silvestre daña su salud, altera los comportamientos naturales (como suele suceder en el Parque Nacional Iguazú con los Coatíes, por ejemplo), generando una mayor exposición a depredadores, entre otros peligros. </span></li>
<li style="font-weight: 400;" aria-level="1"><b>Store food and garbage</b> <b>food and garbage </b> <span style="font-weight: 400;">preventing animals from accessing it. In many cases, it can be hung from branches or stones, using a thin string with the spout of a cut plastic bottle threaded onto it. In this way, the smaller and more agile "lauchas" cannot reach the bundles. </span></li>
<li style="font-weight: 400;" aria-level="1"><b>Control your pets</b><span style="font-weight: 400;"> at all times. If possible, it is best to leave them at home. </span></li>
<li style="font-weight: 400;" aria-level="1"><b>Learn about the</b> <b>wildlife</b><span style="font-weight: 400;">their periods and particularities. Avoid encounters during mating, nesting, breeding or wintering periods. </span></li>
</ul>
<h2><strong>Take other people into consideration</strong></h2>
<b><i>"Treat others as you would like to be treated" is a rule that also applies to outdoor life.</i></b><span style="font-weight: 400;">is a rule that also applies to outdoor life.</span>
<ul>
<li style="font-weight: 400;" aria-level="1"><b>Respect</b> <b>the rest</b><span style="font-weight: 400;"> of adventurers and adventurers. Take care of the quality of their experience. </span></li>
<li style="font-weight: 400;" aria-level="1"><span style="font-weight: 400;">Be polite, </span><b>give way</b><span style="font-weight: 400;"> if your position is better, to those who are coming up or are prone to destabilize, since they are usually making a greater effort and come with more weight.</span></li>
<li style="font-weight: 400;" aria-level="1"><b>There are</b> <b>paths that are shared</b><span style="font-weight: 400;"> by hikers, riders (or mules) and cyclists. Generally, it is established that the hiker has absolute priority and the rider has priority over the cyclist. </span></li>
<li style="font-weight: 400;" aria-level="1"><span style="font-weight: 400;">Rest and camp </span><b>away</b> <b>from trails and visitors</b><span style="font-weight: 400;">.</span></li>
<li style="font-weight: 400;" aria-level="1"><b>Dejá</b> <b>the sounds of</b> <b>sounds of nature prevail</b><span style="font-weight: 400;">. Evitá las voces, la música y los ruidos fuertes. </span></li>
<li style="font-weight: 400;" aria-level="1"><b>Handle your pet</b> properly.</li>
</ul>
If you spend any time outdoors, you’ve probably heard the phrase “leave no trace” .. But what does this mean? It’s all about so-called low-impact practicespractices, which allow us to to enjoy and protect our natural spaces.
During 2019, a total of 4.3 million visitors were recorded in Argentina’s National Parks (NP). Year after year, our love of the outdoors takes its toll on nature: impacted areas with litter, invasive species, habituated wildlife, trail erosion, polluted water sources and more. While those of us who participate in these activities have no intention of harming the natural environment, we may not have the knowledge to preserve it either.
The Seven Principles from “Leave No Trace” (© 1999 by the Leave No Trace Center for Outdoor Ethics: www.LNT.org), provide an easy-to-understand framework of minimum impact practices. minimal impact practicesfor everyone who goes out into nature. These principles can be applied anywhere, from remote wilderness areas to local parks and squares and even in your own backyard. In other words, they apply to almost every outdoor recreational activities. Cada principio cubre un tema específico y brinda información detallada para minimizar nuestro impacto.
- Plan ahead and be prepared.
- Walk and camp on resistant surfaces.
- Dispose of waste and garbage properly.
- Leave what you find, do not take anything “as a souvenir”.
- Minimize the impact of fire.
- Respect wildlife.
- Be considerate of other people.
-
Plan ahead and be prepared
This applies on several levels: if you are not well prepared, you are more likely to have problems. Lack of planning can lead to situations of fatigue or fear, forcing you to make bad decisions. Planning aheadincluding researching the destination y packing accordingly..
- Research the regulations, environmentalenvironmental particularities and risks of the area to be traveled.
- Schedule your tripavoiding the busiest times of the year.
- I went out in small groups. Si no fuera posible, una alternativa es subdividir los grupos.
- Repackage food to minimize to minimize waste.
- Be prepared for extreme weather conditionshazards and emergencies.
- Use GPS or navigate with chart and compass, to eradicate the use of marking paint, rock piles or others.
Walk and camp on resistant surfaces
When you’re exploring, preparing for a picnic or setting up camp, look for types of hardy hardy terrain. Las superficies ideales incluyen established trails and campsites. También rock, gravel, dry grass or snow.
In transited areas:
- Use the existing existing trails and campsites.
- Camp at least 60 m from lakes and streams.
- Arma kids camps. Concentrá la actividad en áreas donde no haya vegetación.
- Walk in single file in the middle of the traileven when it is wet or muddy.
In pristine (virgin) areas:
- Disperse the use of the area to avoid avoid the generation of campgrounds and trails..
- Avoid places where the impact has just begun.
Proper disposal of waste and garbage
This principle applies to applies to everythingfrom toilet paper and wet wipes, to human waste, to rinse water when brushing your teeth, to garbage in general.
- If it came with you, it comes back with you. Inspeccioná el campamento y área de baño en busca de basura o alimentos derramados. Embolsá toda la basura (restos de comida, envoltorios, papeles, etc) y bajalos con vos. Dejá siempre el lugar más limpio de lo que lo encontraste.
- For the poop 💩, you should have a small shovel to be able to make holes 15 to 20 cm deep and bury solid waste in the and bury the solid waste (the paper/wipes with which we clean ourselves, go down with you), at least 60 m from the water, camp and 60 m from the water, camp and trails.. Al terminar, rellená y cubrí con la cobertura de suelo original. En algunas áreas naturales muy afectadas o campamentos de altura, como por ejemplo en el Parque Provincial Cordón del Plata, se requiere incluso que bajemos los desechos humanos: para ésto, es altamente recomendado el uso del Poop-Tube.
- Toilet paper, wet wipes and other personal hygiene items, you should bring them with you. Para esto, es indispensable contar con una pequeña bolsa para los residuos personales.
- To rinse your body or wash the dishes, you have to transport the necessary carry the necessary water 60 m away from the cause. Para lavar vajilla, se recomienda el uso de piedras pequeñas u arena. Si usamos productos, deben ser biodegradables y en muy pequeñas cantidades. Al lavar platos, esparcí el agua “dirty” after rinsing. A good alternative, for places where you arrive by car, is to use a bucket for all the above mentioned tasks.
Leave what you find, do not take anything “as a souvenir”.
Another phrase you must have heard if you come out into nature is: “take only pictures, leave only footprints”.which is valid, although not even leaving footprints is even better.
- Preserve the pastIn countless itineraries (especially in northern Argentina) it is possible to find cultural or historical structures and artifacts. They can be examined, but not touched or intervened.
- Dejá stones, plants and other natural objects as you find them.
- Avoid introducing or transporting non-native species.. También es necesario limpiar las suelas del calzado, los cascos de los kayak y los neumáticos de las bicis entre viajes.
- Do not build structuresfurniture or ditches.
Minimize the impact of fire
The campfire is a timeless camping ritual, but it is also the most destructive of rituals. The best option is not to build a fireThere are light heaters for cooking and lanterns for light. Stargazing is an excellent nighttime activity and is best enjoyed in total darkness.
- Where permitted, use existing and/or permitted fireplaces.
- The fire should be small.
- Only can only feed on sticks and fallen branches. Tomá solo aquellas que puedas romper con las manos.
- Do not take firewood from elsewhereas it may introduce pests or diseases. If you are going to buy it, buy it from a local source.
- Burn all the wood and charcoal to ashes. Extinguish the fire completely.
Respect wildlife
Do not approach animals. La mejor forma de contemplar la vida que nos rodea y disfrutar de los encuentros casuales con animales, es a través del zoom de nuestras cámaras o de un par de binoculares.
- Observe wildlife from a distance. Do not follow the animals or get close to them.
- Never feed the animals. Alimentar a la vida silvestre daña su salud, altera los comportamientos naturales (como suele suceder en el Parque Nacional Iguazú con los Coatíes, por ejemplo), generando una mayor exposición a depredadores, entre otros peligros.
- Store food and garbage food and garbage preventing animals from accessing it. In many cases, it can be hung from branches or stones, using a thin string with the spout of a cut plastic bottle threaded onto it. In this way, the smaller and more agile “lauchas” cannot reach the bundles.
- Control your pets at all times. If possible, it is best to leave them at home.
- Learn about the wildlifetheir periods and particularities. Avoid encounters during mating, nesting, breeding or wintering periods.
Take other people into consideration
“Treat others as you would like to be treated” is a rule that also applies to outdoor life.is a rule that also applies to outdoor life.
- Respect the rest of adventurers and adventurers. Take care of the quality of their experience.
- Be polite, give way if your position is better, to those who are coming up or are prone to destabilize, since they are usually making a greater effort and come with more weight.
- There are paths that are shared by hikers, riders (or mules) and cyclists. Generally, it is established that the hiker has absolute priority and the rider has priority over the cyclist.
- Rest and camp away from trails and visitors.
- Dejá the sounds of sounds of nature prevail. Evitá las voces, la música y los ruidos fuertes.
- Handle your pet properly.