<strong>When we go out into nature</strong> in search of starry skies, <strong>one of the most important decisions</strong> we must make<strong> is which sleeping bag to take.</strong> <blockquote>A good sleeping system for sleeping in nature pays off in comfortable and restful hours of sleep.</blockquote>
These are the key factors to take into account:
<ul>
<li><strong>Temperature ranges:</strong> It is advisable to choose a bag rated slightly below the typical/expected outdoor temperature.</li>
<li><strong>Sleeping system:</strong> In addition to the sleeping bag, it is essential to have a good insulator.</li>
<li><strong>Padding:</strong> Foam or synthetic? Several factors play a role here, such as heat containment power, compression, durability, weather conditions and humane treatment of the animals. </li>
<li><strong>Weight:</strong> A bag needs more insulation material to have a lower (i.e. warmer) temperature rating. Therefore, we should compare the weight between bags with similar temperature ratings. </li>
<li>Other features: types of adjustment, fabric types, hidden pockets, pillow compatibility, etc.</li>
</ul>
<span style="font-family: impact, sans-serif; font-size: 18pt;">Sleeping bag temperature ranges</span>
The temperature ratings of a sleeping bag identify the temperatures for which it was designed. It is always advisable to choose a sleeping bag with a temperature rating a few degrees lower than the lowest temperature we expect to encounter. For this task, it is important to understand temperature ranges and their terms:
<ul>
<li><strong>An ISO or EN approved temperature range indicates that two sleeping bags can be reliably compared with</strong> respect to the manufacturer's temperature specification. These standardized tests ensure that temperature ranges can be reliably compared between manufacturers (brands). </li>
<li>Based on ISO/EN standardized tests, the bag is assigned <strong>temperature ranges: maximum, comfort, limit and extreme.</strong>
<ul>
<li>The "<strong>comfort</strong>" rating is the lowest temperature at which the bag will keep a cold person comfortable during sleep and is usually associated with the comfort temperature for a woman.</li>
<li>The "limit" rating is the lowest temperature at which the bag will keep a person who is not usually cold at night comfortable and is generally assigned to the comfort temperature for a man.</li>
<li>The "maximum" rating is optional and indicates up to which temperatures the bag does not generate excess heat; while the "extreme" temperature is for survival for 6 hours without going into hypothermia. Outside these ranges it is not possible to fall asleep. </li>
</ul>
</li>
</ul>
<span style="font-family: impact, sans-serif; font-size: 18pt;">Rest system</span>
The sensation of cold when sleeping depends on many variables, including humidity, wind, type of shelter and soil conditions. However, it is the sleeping system that is critical. <strong>This system has three basic components: 1) the sleeping bag, 2) the insulation and 3) the clothing. </strong>
If we use an insulator with poor insulating power in cold temperatures, the sleeping bag will not live up to its rating. The rating of a sleeping bag is based on a person wearing full-length underwear and socks, along with an insulator for extreme conditions.
<blockquote><strong>Insulation, clothing and bag work together.</strong> In this table, we show you how they should be complemented, depending on the weather conditions:</blockquote>
<table width="614">
<tbody>
<tr>
<td width="136"><strong>CONDITIONS</strong></td>
<td width="119"><strong>WARM</strong></td>
<td width="123"><strong>TEMPERATE</strong></td>
<td width="123"><strong>COLD</strong></td>
<td width="113"><strong>EXTREME</strong></td>
</tr>
<tr>
<td width="136"><strong>Expected nighttime minimum</strong></td>
<td width="119">10°C</td>
<td width="123">0°C</td>
<td width="123">-7°C</td>
<td width="113">-18°C</td>
</tr>
<tr>
<td width="136"><strong>Insulation
(R* value)</strong></td>
<td width="119">less than 2</td>
<td width="123">2-3,9</td>
<td width="123">4-5,4</td>
<td width="113">5,5+</td>
</tr>
<tr>
<td width="136"><strong>Bag: temperature classification</strong></td>
<td width="119">0°C or less</td>
<td width="123">-5°C or less</td>
<td width="123">-10°C or less</td>
<td width="113">-18°C or less</td>
</tr>
</tbody>
</table>
<em>*The <b>value of R</b> is a measure of how well a surface barrier, i.e. a layer of <strong>insulation</strong>, resists the heat-conducting flow.</em>
<span style="font-weight: 400;">Recommendation: if you usually feel hot when sleeping, take into account the "limit" temperature of the range. If you usually feel cold when sleeping, go for the "comfort" temperature. </span>
<span style="font-family: impact, sans-serif; font-size: 18pt;">Fillers</span>
These are the most important differences between feather and synthetic fillings:
<table width="576">
<tbody>
<tr>
<td width="152"><strong>FILL</strong></td>
<td width="424"><strong>Key benefit</strong></td>
</tr>
<tr>
<td width="152"><strong>Pen</strong></td>
<td width="424">
<ul style="list-style-type: circle;">
<li>Light</li>
<li>Easy to compress</li>
<li>It excels in cold and dry conditions.</li>
<li>Durable</li>
</ul>
</td>
</tr>
<tr>
<td width="152"><strong>Synthetic</strong></td>
<td width="424">
<ul style="list-style-type: circle;">
<li>Fast drying</li>
<li>Insulates when wet</li>
<li>Ideal for wet conditions</li>
<li>Hypoallergenic</li>
</ul>
</td>
</tr>
</tbody>
</table>
Some additional details about each type of filler: <strong>Feather</strong>: On average, it is more expensive than synthetic fillers, lighter and more durable. When comparing qualities, we can focus on these points:
<ul>
<li>What does<strong>fill power</strong>mean? It is a specification that indicates the quality of the material. If the number is higher, it is because it generates more warmth. </li>
<li>Is there such a thing as<strong> water resistant down</strong>? Yes, some manufacturers use feather fillings that have a water repellent treatment. </li>
<li>What is RDS/TDS and how does it relate to the <strong>humane treatment of animals</strong>? Indicates that bag manufacturers have taken steps to ensure the humane treatment of the ducks and geese that produce the material through the following programs: RDS (Responsible Down Standard) and TDS (global Traceable Down Standard). </li>
</ul>
<strong>Synthetic:</strong> Offers solid performance at an affordable price. Unlike down, it continues to keep you warm when wet, making it the best choice for humid climates. Most of these fillings are polyester-based.
<blockquote>The filler is what determines the size of the bag when compressed. Therefore, we must compare "compressed volume" specifications to understand the size differences between bags. </blockquote>
<span style="font-family: impact, sans-serif; font-size: 18pt;">Weight of the sleeping bag</span>
The most important factors are the filling and shape. Advanced synthetics and feathers with high filling power provide more warmth for less weight. <strong>Fill weight</strong>: The total weight of the bag is what matters when carrying a bag in a backpack. However, some manufacturers also indicate the weight of the filler, i.e. the insulating material of the bag. In non-approved bags, we can use this value as an indicator of the warmth capacity (if it has more padding, it will be warmer). <strong>Bag shape</strong>: Sleeping bags come in three basic shapes.
<ul>
<li><strong>Mummy</strong>: In order to increase warmth and reduce weight, this bag has a slim fit, with a contoured hood that can be adjusted. The fit is 'to the body' and, if we turn to change position, we will do so next to the bag. </li>
<li><strong>Semi-rectangular</strong>: Also known as "modified mummy" or "barrel". Offers a balance between warmth and comfort. </li>
<li style="font-weight: 400;" aria-level="1"><b>Rectangular</b><span style="font-weight: 400;">Camping bags: Generally, these are camping bags. They offer comfort of movement when sleeping, but are heavier. </span></li>
</ul>
<blockquote>All sleeping bags keep you comfortable, because they retain the air heated by your own body. But this task is easier in a small space like a "mummy" bag, and more difficult in a large space, as is the case with rectangular formats. </blockquote>
Finally, we must consider what is the most appropriate <strong>size</strong>. Most bags come in regular and long sizes, although there are shorter variations for smaller people.
<span style="font-family: impact, sans-serif; font-size: 18pt;">Additional features</span>
<strong>Adjustable hood</strong>: Provides extra warmth, especially when the collar is adjusted around the head and only the nose and mouth are uncovered. <strong>Draft blocking</strong>: Air tubes run the length of the bag behind the zipper to prevent warm air from escaping. <strong>Anti-zip closure</strong>: Some bags protect the closures with a full-length zipper protector. <strong>Left or right zipper</strong>: Intended for 'joining' sleeping bags. One person has a bag with a zipper on the left, the other has a bag with a zipper on the right, and a special zipper joins the two bags together. However, it creates additional air space inside and limits the comfort of movement. <strong>Hidden pocket</strong>: Generally located on the chest, it is useful to protect items such as a watch, headlamp, GPS and extra batteries from the cold. <strong>Pillow pocket</strong>: Some bags include this pocket in the hood that allows you to tuck clothing inside. <strong>Sleeping bag outer shell</strong>: Usually made of rip-stop nylon or polyester. Some are treated with a durable water repellent (DWR) finish to keep out moisture.
<span style="font-family: impact, sans-serif; font-size: 18pt;">Accessories</span>
<strong>Compression bag</strong>: These are cloth bags with straps to easily compress the bag. <strong>Resting bag</strong>: Leaving a sleeping bag compressed for long periods of time affects its ability to insulate. For that, large bags are used where the bag can be stored without being compressed. <strong>Thermal bag liner</strong>: This is a cylindrical fabric envelope that slides inside the bag, helping to minimize wear and tear and keep the bag clean.
When we go out into nature in search of starry skies, one of the most important decisions we must make is which sleeping bag to take.
A good sleeping system for sleeping in nature pays off in comfortable and restful hours of sleep.
These are the key factors to take into account:
Temperature ranges: It is advisable to choose a bag rated slightly below the typical/expected outdoor temperature.
Sleeping system: In addition to the sleeping bag, it is essential to have a good insulator.
Padding: Foam or synthetic? Several factors play a role here, such as heat containment power, compression, durability, weather conditions and humane treatment of the animals.
Weight: A bag needs more insulation material to have a lower (i.e. warmer) temperature rating. Therefore, we should compare the weight between bags with similar temperature ratings.
Other features: types of adjustment, fabric types, hidden pockets, pillow compatibility, etc.
Sleeping bag temperature ranges
The temperature ratings of a sleeping bag identify the temperatures for which it was designed. It is always advisable to choose a sleeping bag with a temperature rating a few degrees lower than the lowest temperature we expect to encounter. For this task, it is important to understand temperature ranges and their terms:
An ISO or EN approved temperature range indicates that two sleeping bags can be reliably compared with respect to the manufacturer’s temperature specification. These standardized tests ensure that temperature ranges can be reliably compared between manufacturers (brands).
Based on ISO/EN standardized tests, the bag is assigned temperature ranges: maximum, comfort, limit and extreme.
The “comfort” rating is the lowest temperature at which the bag will keep a cold person comfortable during sleep and is usually associated with the comfort temperature for a woman.
The “limit” rating is the lowest temperature at which the bag will keep a person who is not usually cold at night comfortable and is generally assigned to the comfort temperature for a man.
The “maximum” rating is optional and indicates up to which temperatures the bag does not generate excess heat; while the “extreme” temperature is for survival for 6 hours without going into hypothermia. Outside these ranges it is not possible to fall asleep.
Rest system
The sensation of cold when sleeping depends on many variables, including humidity, wind, type of shelter and soil conditions. However, it is the sleeping system that is critical. This system has three basic components: 1) the sleeping bag, 2) the insulation and 3) the clothing.
If we use an insulator with poor insulating power in cold temperatures, the sleeping bag will not live up to its rating. The rating of a sleeping bag is based on a person wearing full-length underwear and socks, along with an insulator for extreme conditions.
Insulation, clothing and bag work together. In this table, we show you how they should be complemented, depending on the weather conditions:
CONDITIONS
WARM
TEMPERATE
COLD
EXTREME
Expected nighttime minimum
10°C
0°C
-7°C
-18°C
Insulation
(R* value)
less than 2
2-3,9
4-5,4
5,5+
Bag: temperature classification
0°C or less
-5°C or less
-10°C or less
-18°C or less
*The value of R is a measure of how well a surface barrier, i.e. a layer of insulation, resists the heat-conducting flow.
Recommendation: if you usually feel hot when sleeping, take into account the “limit” temperature of the range. If you usually feel cold when sleeping, go for the “comfort” temperature.
Fillers
These are the most important differences between feather and synthetic fillings:
FILL
Key benefit
Pen
Light
Easy to compress
It excels in cold and dry conditions.
Durable
Synthetic
Fast drying
Insulates when wet
Ideal for wet conditions
Hypoallergenic
Some additional details about each type of filler: Feather: On average, it is more expensive than synthetic fillers, lighter and more durable. When comparing qualities, we can focus on these points:
What doesfill powermean? It is a specification that indicates the quality of the material. If the number is higher, it is because it generates more warmth.
Is there such a thing as water resistant down? Yes, some manufacturers use feather fillings that have a water repellent treatment.
What is RDS/TDS and how does it relate to the humane treatment of animals? Indicates that bag manufacturers have taken steps to ensure the humane treatment of the ducks and geese that produce the material through the following programs: RDS (Responsible Down Standard) and TDS (global Traceable Down Standard).
Synthetic: Offers solid performance at an affordable price. Unlike down, it continues to keep you warm when wet, making it the best choice for humid climates. Most of these fillings are polyester-based.
The filler is what determines the size of the bag when compressed. Therefore, we must compare “compressed volume” specifications to understand the size differences between bags.
Weight of the sleeping bag
The most important factors are the filling and shape. Advanced synthetics and feathers with high filling power provide more warmth for less weight. Fill weight: The total weight of the bag is what matters when carrying a bag in a backpack. However, some manufacturers also indicate the weight of the filler, i.e. the insulating material of the bag. In non-approved bags, we can use this value as an indicator of the warmth capacity (if it has more padding, it will be warmer). Bag shape: Sleeping bags come in three basic shapes.
Mummy: In order to increase warmth and reduce weight, this bag has a slim fit, with a contoured hood that can be adjusted. The fit is ‘to the body’ and, if we turn to change position, we will do so next to the bag.
Semi-rectangular: Also known as “modified mummy” or “barrel”. Offers a balance between warmth and comfort.
RectangularCamping bags: Generally, these are camping bags. They offer comfort of movement when sleeping, but are heavier.
All sleeping bags keep you comfortable, because they retain the air heated by your own body. But this task is easier in a small space like a “mummy” bag, and more difficult in a large space, as is the case with rectangular formats.
Finally, we must consider what is the most appropriate size. Most bags come in regular and long sizes, although there are shorter variations for smaller people.
Additional features
Adjustable hood: Provides extra warmth, especially when the collar is adjusted around the head and only the nose and mouth are uncovered. Draft blocking: Air tubes run the length of the bag behind the zipper to prevent warm air from escaping. Anti-zip closure: Some bags protect the closures with a full-length zipper protector. Left or right zipper: Intended for ‘joining’ sleeping bags. One person has a bag with a zipper on the left, the other has a bag with a zipper on the right, and a special zipper joins the two bags together. However, it creates additional air space inside and limits the comfort of movement. Hidden pocket: Generally located on the chest, it is useful to protect items such as a watch, headlamp, GPS and extra batteries from the cold. Pillow pocket: Some bags include this pocket in the hood that allows you to tuck clothing inside. Sleeping bag outer shell: Usually made of rip-stop nylon or polyester. Some are treated with a durable water repellent (DWR) finish to keep out moisture.
Accessories
Compression bag: These are cloth bags with straps to easily compress the bag. Resting bag: Leaving a sleeping bag compressed for long periods of time affects its ability to insulate. For that, large bags are used where the bag can be stored without being compressed. Thermal bag liner: This is a cylindrical fabric envelope that slides inside the bag, helping to minimize wear and tear and keep the bag clean.
<span style="font-weight: 400;">When you're out in nature, layered clothing becomes your smart technology thermostat: it allows you to regulate your comfort by putting on and taking off "layers" of clothing as your activity level or the weather changes.</span>
<span style="font-weight: 400;">To understand </span><b>how to properly wear layers of clothing for outdoor </b><span style="font-weight: 400;">for outdoor activities, </span><b>we need to know the function of each</b><span style="font-weight: 400;">:</span>
<ul>
<li style="font-weight: 400;" aria-level="1"><b>First Layer</b><span style="font-weight: 400;">: manages moisture and wicks sweat away from the skin.</span></li>
<li style="font-weight: 400;" aria-level="1"><b>Second Layer</b><span style="font-weight: 400;">is insulating and retains body heat to protect you from the cold.</span></li>
<li style="font-weight: 400;" aria-level="1"><b>Third layer</b><span style="font-weight: 400;">protects you from wind and rain.</span></li>
</ul>
<span style="font-weight: 400;">Even if you don't wear all three entry layers, it's a good idea to wear garments that </span><b>to carry garments that fulfill the purpose of each one</b><span style="font-weight: 400;">so that you can shed your clothes if you get warm and always be prepared to deal with wind and rain.</span>
<h2>First Layer: Moisture management</h2>
<span style="font-weight: 400;">It is the layer that </span><b>is attached to the skin and its function is to keep perspiration away from the skin.</b><span style="font-weight: 400;">. Por eso, en condiciones frescas o frías, se necesitan primeras capas tales como interiores térmicos largos y absorbentes, </span><b>to keep your skin dry and prevent you from getting cold.</b><span style="font-weight: 400;">. </span>
<b>Materials:</b>
<span style="font-weight: 400;">You can opt for </span><b>synthetic materials, such as polyester and nylon, or natural fibers, such as merino wool and silk</b><span style="font-weight: 400;">. Todos cumplen su función, pero existen diferencias en cuanto a la absorción, el secado, la retención de olores y la durabilidad. </span>
<b>Weight:</b>
<span style="font-weight: 400;">The options are: </span><b>light, medium and heavy.</b><span style="font-weight: 400;">However, you may also find terms like "ultralight" at one end of the spectrum or "expedition" at the other. Heavier (thicker) fabrics will keep you warmer, although that is not the main purpose of a first layer. </span>
<b>Warm climates:</b>
<span style="font-weight: 400;">Here are some considerations on </span><b>first layers for warm climates</b><span style="font-weight: 400;">:</span>
<ul>
<li style="font-weight: 400;" aria-level="1"><b>Any</b> <b>t-shirt or summer shirt is a good</b><span style="font-weight: 400;"> is a good first layer, especially if it is made of a fabric that </span><b>made of a wicking fabric, as moisture wicks through the fibers</b><span style="font-weight: 400;">moisture is wicked through the fibers and allows evaporation.</span></li>
<li style="font-weight: 400;" aria-level="1"><b>Underwear, such as</b><span style="font-weight: 400;">such as briefs and bras, </span><b>also</b> <b>should also absorb moisture.</b></li>
<li style="font-weight: 400;" aria-level="1"><b>The</b> <b>UPF-rated base layers give you extra sun protection for sunny days.</b><span style="font-weight: 400;"> protection for sunny days.</span></li>
<li style="font-weight: 400;" aria-level="1"><b>Cotton</b><span style="font-weight: 400;">cotton, considered a definite NO in winter, as it absorbs water and in contact with the skin can cool you down, </span><b>is fine</b> <b>if you are outdoors during a super dry summer day.</b><span style="font-weight: 400;">.</span></li>
<li style="font-weight: 400;" aria-level="1"><b>There are</b> <b>membranes designed to cool the skin on hot days, such as fabric impregnated with ceramic particles.</b><span style="font-weight: 400;">such as fabric impregnated with ceramic particles.</span></li>
</ul>
<h2>Second Layer: Insulation and Sheltering</h2>
<span style="font-weight: 400;">The second layer </span><b>is what helps retain the heat radiating from your body.</b><span style="font-weight: 400;">. Como las prendas por sí solas no tienen la capacidad de generar calor, es importante que esta capa sea eficiente. </span>
<b>Interlayer materials:</b>
<span style="font-weight: 400;">There are </span><b>synthetic and natural options</b><span style="font-weight: 400;">. A continuación, analizamos algunos de los </span><b>most common materials</b><span style="font-weight: 400;">:</span>
<ul>
<li style="font-weight: 400;" aria-level="1"><b>Polyester fibers (the old and well-known </b><b><i>polar</i></b><b>):</b><span style="font-weight: 400;">
</span><span style="font-weight: 400;">It is </span><b>available in light, medium and heavy weight versions (sometimes marketed as polar 100, 200 and 300).</b><span style="font-weight: 400;"> (sometimes marketed as polar 100, 200 and 300). </span><b>Keeps you warm</b> <b>even if it gets wet, dries quickly, and is</b><span style="font-weight: 400;"> r</span><b>breathes well</b><span style="font-weight: 400;">. Sin embargo, el viento atraviesa fácilmente las fibras, lo que puede disipar el calor. Algunas prendas traen membranas rompe viento, pero de no ser así, podés combinar tu polar con una tercera capa que sea rompe viento. </span></li>
<li style="font-weight: 400;" aria-level="1"><b>Down jackets:</b><span style="font-weight: 400;">
</span><span style="font-weight: 400;">Being very compressible, </span><b>they take up little space in the backpack</b><span style="font-weight: 400;">. Además, </span><b>offer the best warmth to weight ratio</b><span style="font-weight: 400;">. Las plumas </span><b>can be goose, duck or blended.</b><span style="font-weight: 400;">varying in their compression and heat retention capacities, depending on their fill power (</span><i><span style="font-weight: 400;">fill power</span></i><span style="font-weight: 400;">), ranging from 450 to 900. </span> <b> loses insulating efficiency when wet</b><span style="font-weight: 400;">although there are technologies that minimize this effect.</span><span style="font-weight: 400;">
</span><i><span style="font-weight: 400;">The great disadvantage of the feather is that it comes from animals. There are traceability standards that ensure dignified treatment of the animal. When purchasing these garments, everyone is aware of what they are doing. </span></i></li>
<li style="font-weight: 400;" aria-level="1"><b>Synthetic padded jackets:</b><span style="font-weight: 400;">
</span><span style="font-weight: 400;">Synthetic insulations</span><b> mimic the efficiency of the feather</b><span style="font-weight: 400;"> and every year they are getting a little closer to this standard. Although synthetic fibers do not compress as well as goose down, </span> <span style="font-weight: 400;">are a popular </span><b>popular choice for rainy conditions</b><span style="font-weight: 400;">conditions, as they </span><b>maintain insulation capacity when wet.</b></li>
</ul>
<h2>Third Layer: Climate protection</h2>
<span style="font-weight: 400;">The third layer </span><b>protects you from wind, rain and snow. </b> <span style="font-weight: 400;">The so-called </span><i><span style="font-weight: 400;">parkas</span></i><span style="font-weight: 400;"> are a fundamental piece of your equipment, because if wind and water seep into the inner layers, you can get seriously chilled.</span>
<span style="font-weight: 400;">Most are treated with durable water repellent (DWR), so that water is quickly wicked away from the fabric.</span>
<span style="font-weight: 400;">They can be grouped into the following categories:</span>
<ul>
<li style="font-weight: 400;" aria-level="1"><b>Waterproof / breathable parkas:</b><span style="font-weight: 400;">
</span><span style="font-weight: 400;">It is the </span><b>most functional option</b><span style="font-weight: 400;"> for adverse weather conditions, although it is also the most </span><b>also the most expensive</b><span style="font-weight: 400;">. Existen variedad de membranas en el mercado, siendo Gore-Tex la más conocida. </span></li>
<li style="font-weight: 400;" aria-level="1"><b>Water resistant / breathable parkas:</b><span style="font-weight: 400;">
</span><span style="font-weight: 400;">They are </span><b>are best suited for drizzle, wind and high levels of activity.</b><span style="font-weight: 400;"> They are also </span><b>they are more economical</b><span style="font-weight: 400;">. Están hechas de telas de nailon o poliéster apretado, que permiten bloquear el viento y la lluvia ligeros. </span></li>
<li style="font-weight: 400;" aria-level="1"><b>Soft parkas (</b><b><i>soft shells</i></b><b>):</b><span style="font-weight: 400;">
</span><span style="font-weight: 400;">Emphasize breathability and are technical garments designed for activity in wet conditions. </span><b>designed for activity in wet conditions.</b><span style="font-weight: 400;">. La mayoría cuenta con paneles de tela elástica donde el ejercicio lo requiere. </span></li>
<li style="font-weight: 400;" aria-level="1"><b>Waterproof / non-breathable parkas:</b><span style="font-weight: 400;">
</span><span style="font-weight: 400;">These basic parkas are fine for </span><b>for rainy days with little or no activity. </b> <span style="font-weight: 400;">(e.g. fishing). They are usually made of coated nylon, which is water and wind resistant. </span></li>
</ul>
<h2>Some examples</h2>
<span style="font-weight: 400;">We are often asked </span><b>how to apply coatings for a given climate</b><span style="font-weight: 400;">. Sin embargo, cualquier sugerencia basada únicamente en el clima, pasa por alto temas claves, como el nivel de esfuerzo y el metabolismo personal. </span>
<span style="font-weight: 400;">Therefore, the examples below are for a hypothetical person, who is not particularly hot or cold naturally and who is going to do a half-day trekking, intermediate level:</span>
<ul>
<li style="font-weight: 400;" aria-level="1"><b>Layers for cold weather (some wind):</b><span style="font-weight: 400;">
</span><span style="font-weight: 400;">Top, long thermal interiors; underneath, medium polyester interiors. Lightweight warm jacket with synthetic insulation. Medium trekking pants. Jacket and pants </span> <i><span style="font-weight: 400;"> windbreaker</span></i><span style="font-weight: 400;">/breathable (can be waterproof jacket and pants).</span></li>
<li style="font-weight: 400;" aria-level="1"><b>Rainy weather layers (cool temperatures):</b><span style="font-weight: 400;">
</span><span style="font-weight: 400;">Top, long thermal underwear; underneath, lightweight polyester underwear. Lightweight breathable micro fleece. Synthetic trekking pants. Lightweight, waterproof and breathable jacket and pants (with open vents). </span></li>
<li style="font-weight: 400;" aria-level="1"><b>Layers for warm weather:</b><span style="font-weight: 400;">
</span><span style="font-weight: 400;">Polyester underwear and short-sleeved synthetic T-shirt. Convertible trekking pants. Jacket </span> <i><span style="font-weight: 400;"> breaks wind</span></i><span style="font-weight: 400;"> light.</span></li>
</ul>
<span style="font-weight: 400;">It is essential that you take the necessary time to adjust the </span><b><i>adjust</i></b><b> the layers as conditions change.</b><span style="font-weight: 400;">. Por ejemplo, si la lluvia y el viento disminuyen, podés guardar la campera impermeable. Si el trekking no te hace entrar en calor rápidamente, arrancá la caminata con una capa intermedia. Luego, mantenela a mano para los momentos de descanso o de hidratación. </span>
When you’re out in nature, layered clothing becomes your smart technology thermostat: it allows you to regulate your comfort by putting on and taking off “layers” of clothing as your activity level or the weather changes.
To understand how to properly wear layers of clothing for outdoor for outdoor activities, we need to know the function of each:
First Layer: manages moisture and wicks sweat away from the skin.
Second Layeris insulating and retains body heat to protect you from the cold.
Third layerprotects you from wind and rain.
Even if you don’t wear all three entry layers, it’s a good idea to wear garments that to carry garments that fulfill the purpose of each oneso that you can shed your clothes if you get warm and always be prepared to deal with wind and rain.
First Layer: Moisture management
It is the layer that is attached to the skin and its function is to keep perspiration away from the skin.. Por eso, en condiciones frescas o frías, se necesitan primeras capas tales como interiores térmicos largos y absorbentes, to keep your skin dry and prevent you from getting cold..
Materials:
You can opt for synthetic materials, such as polyester and nylon, or natural fibers, such as merino wool and silk. Todos cumplen su función, pero existen diferencias en cuanto a la absorción, el secado, la retención de olores y la durabilidad.
Weight:
The options are: light, medium and heavy.However, you may also find terms like “ultralight” at one end of the spectrum or “expedition” at the other. Heavier (thicker) fabrics will keep you warmer, although that is not the main purpose of a first layer.
Warm climates:
Here are some considerations on first layers for warm climates:
Anyt-shirt or summer shirt is a good is a good first layer, especially if it is made of a fabric that made of a wicking fabric, as moisture wicks through the fibersmoisture is wicked through the fibers and allows evaporation.
Underwear, such assuch as briefs and bras, alsoshould also absorb moisture.
TheUPF-rated base layers give you extra sun protection for sunny days. protection for sunny days.
Cottoncotton, considered a definite NO in winter, as it absorbs water and in contact with the skin can cool you down, is fineif you are outdoors during a super dry summer day..
There aremembranes designed to cool the skin on hot days, such as fabric impregnated with ceramic particles.such as fabric impregnated with ceramic particles.
Second Layer: Insulation and Sheltering
The second layer is what helps retain the heat radiating from your body.. Como las prendas por sí solas no tienen la capacidad de generar calor, es importante que esta capa sea eficiente.
Interlayer materials:
There are synthetic and natural options. A continuación, analizamos algunos de los most common materials:
Polyester fibers (the old and well-known polar): It is available in light, medium and heavy weight versions (sometimes marketed as polar 100, 200 and 300). (sometimes marketed as polar 100, 200 and 300). Keeps you warmeven if it gets wet, dries quickly, and is rbreathes well. Sin embargo, el viento atraviesa fácilmente las fibras, lo que puede disipar el calor. Algunas prendas traen membranas rompe viento, pero de no ser así, podés combinar tu polar con una tercera capa que sea rompe viento.
Down jackets: Being very compressible, they take up little space in the backpack. Además, offer the best warmth to weight ratio. Las plumas can be goose, duck or blended.varying in their compression and heat retention capacities, depending on their fill power (fill power), ranging from 450 to 900. loses insulating efficiency when wetalthough there are technologies that minimize this effect. The great disadvantage of the feather is that it comes from animals. There are traceability standards that ensure dignified treatment of the animal. When purchasing these garments, everyone is aware of what they are doing.
Synthetic padded jackets: Synthetic insulations mimic the efficiency of the feather and every year they are getting a little closer to this standard. Although synthetic fibers do not compress as well as goose down, are a popular popular choice for rainy conditionsconditions, as they maintain insulation capacity when wet.
Third Layer: Climate protection
The third layer protects you from wind, rain and snow. The so-called parkas are a fundamental piece of your equipment, because if wind and water seep into the inner layers, you can get seriously chilled.
Most are treated with durable water repellent (DWR), so that water is quickly wicked away from the fabric.
They can be grouped into the following categories:
Waterproof / breathable parkas: It is the most functional option for adverse weather conditions, although it is also the most also the most expensive. Existen variedad de membranas en el mercado, siendo Gore-Tex la más conocida.
Water resistant / breathable parkas: They are are best suited for drizzle, wind and high levels of activity. They are also they are more economical. Están hechas de telas de nailon o poliéster apretado, que permiten bloquear el viento y la lluvia ligeros.
Soft parkas (soft shells): Emphasize breathability and are technical garments designed for activity in wet conditions. designed for activity in wet conditions.. La mayoría cuenta con paneles de tela elástica donde el ejercicio lo requiere.
Waterproof / non-breathable parkas: These basic parkas are fine for for rainy days with little or no activity. (e.g. fishing). They are usually made of coated nylon, which is water and wind resistant.
Some examples
We are often asked how to apply coatings for a given climate. Sin embargo, cualquier sugerencia basada únicamente en el clima, pasa por alto temas claves, como el nivel de esfuerzo y el metabolismo personal.
Therefore, the examples below are for a hypothetical person, who is not particularly hot or cold naturally and who is going to do a half-day trekking, intermediate level:
Layers for cold weather (some wind): Top, long thermal interiors; underneath, medium polyester interiors. Lightweight warm jacket with synthetic insulation. Medium trekking pants. Jacket and pants windbreaker/breathable (can be waterproof jacket and pants).
Rainy weather layers (cool temperatures): Top, long thermal underwear; underneath, lightweight polyester underwear. Lightweight breathable micro fleece. Synthetic trekking pants. Lightweight, waterproof and breathable jacket and pants (with open vents).
Layers for warm weather: Polyester underwear and short-sleeved synthetic T-shirt. Convertible trekking pants. Jacket breaks wind light.
It is essential that you take the necessary time to adjust the adjust the layers as conditions change.. Por ejemplo, si la lluvia y el viento disminuyen, podés guardar la campera impermeable. Si el trekking no te hace entrar en calor rápidamente, arrancá la caminata con una capa intermedia. Luego, mantenela a mano para los momentos de descanso o de hidratación.
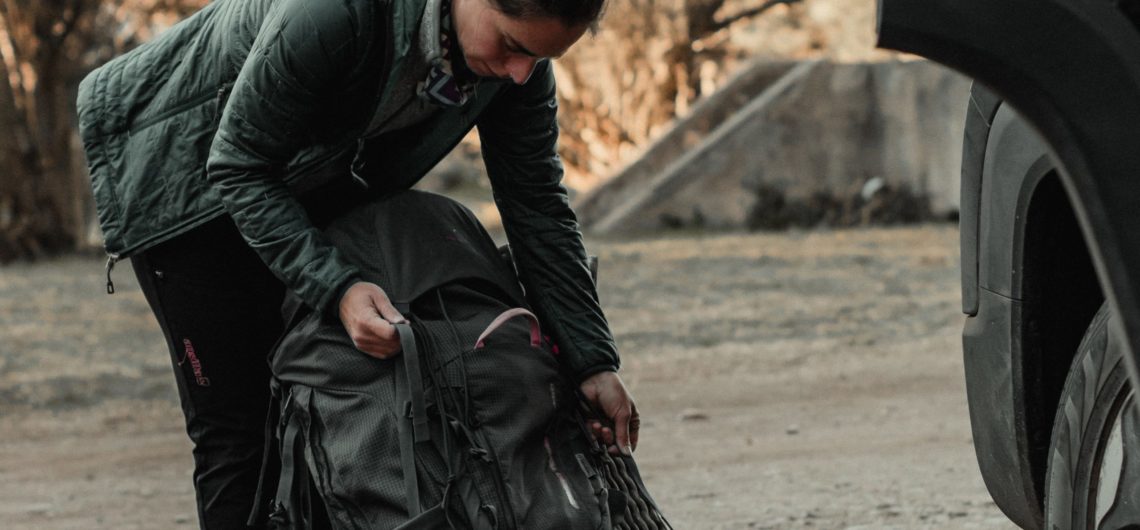
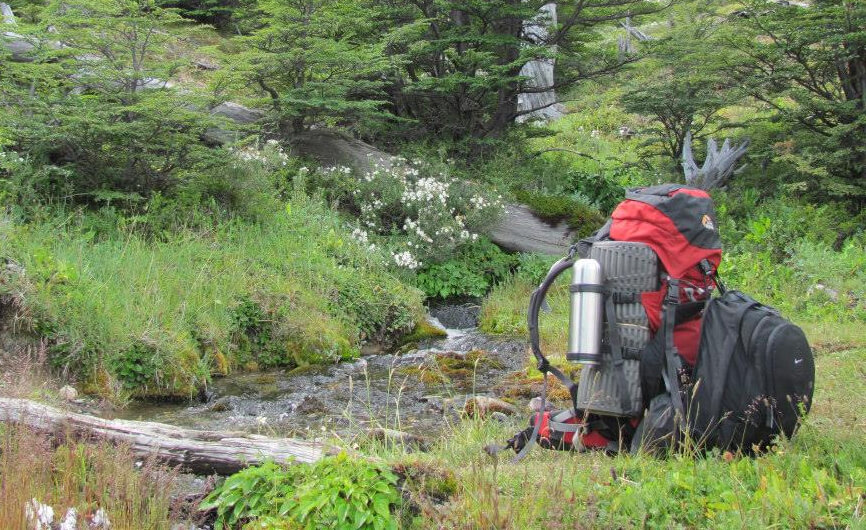
<span style="font-weight: 400;">Assemble your backpack efficiently, it can hold an incredible amount of gear, but it is also important that its distribution is balanced and does not move when you walk. </span><b>that its distribution is balanced and that it doesn't move when you walk.</b><span style="font-weight: 400;">.</span> <span style="font-weight: 400;">The mochi can be divided into </span><b>three zones and peripheral storage</b><span style="font-weight: 400;">:</span>
<ul>
<li style="font-weight: 400;" aria-level="1"><b>Lower area:</b><span style="font-weight: 400;"> ideal for bulky equipment and items not needed until camp.</span></li>
<li style="font-weight: 400;" aria-level="1"><b>Central zone:</b><span style="font-weight: 400;"> good for dense and heavy equipment. The closer the weight is to the back, the better the balance. </span></li>
<li style="font-weight: 400;" aria-level="1"><b>Upper zone:</b><span style="font-weight: 400;"> Recommended for essential items you may need on the road.</span></li>
<li style="font-weight: 400;" aria-level="1"><b>Pockets for accessories:</b><span style="font-weight: 400;"> the ones you need frequently and in an emergency.</span></li>
<li style="font-weight: 400;" aria-level="1"><b>Loops for tools and lashing points:</b><span style="font-weight: 400;"> For large or long equipment, such as trekking poles.</span></li>
</ul>
<span style="font-weight: 400;">The idea is to fill the nooks and crannies until you have a solid, stable load with equally </span><b>and stable load, with the weight equally balanced on each side.</b><span style="font-weight: 400;">. Una vez llena, se ajustan las correas de compresión, para optimizar la carga y evitar que se mueva mientras caminás. </span>
<h2><strong>Lower zone</strong></h2>
<span style="font-weight: 400;">Here are the </span><b>bulky items you don't need to use until camp.</b><span style="font-weight: 400;">. Por ejemplo: </span>
<ul>
<li style="font-weight: 400;" aria-level="1"><span style="font-weight: 400;">Sleeping bag (backpacks usually have a bottom compartment designed for this).</span></li>
<li style="font-weight: 400;" aria-level="1"><span style="font-weight: 400;">Layer you plan to sleep in.</span></li>
<li style="font-weight: 400;" aria-level="1"><span style="font-weight: 400;">Lightweight camping footwear.</span></li>
</ul>
<span style="font-weight: 400;">Packing this type of soft equipment on the bottom creates an internal shock absorption system for the back and backpack.</span>
<h2><strong>Central zone</strong></h2>
<span style="font-weight: 400;">In this part, you put the heavy </span><b>equipment that you are not going to use during the trekking.</b><span style="font-weight: 400;">. Incluye: </span>
<ul>
<li style="font-weight: 400;" aria-level="1"><span style="font-weight: 400;">Meals planned for camping or later days.</span></li>
<li style="font-weight: 400;" aria-level="1"><span style="font-weight: 400;">Kitchen kit.</span></li>
<li style="font-weight: 400;" aria-level="1"><span style="font-weight: 400;">Fuel.</span></li>
<li style="font-weight: 400;" aria-level="1"><span style="font-weight: 400;">Camel bag (sachet-type water tank).</span></li>
<li style="font-weight: 400;" aria-level="1"><span style="font-weight: 400;">Tent body and roof cover.</span></li>
<li style="font-weight: 400;" aria-level="1"><span style="font-weight: 400;">Extra clothing.</span></li>
</ul>
<span style="font-weight: 400;">Pack heavy items in this area and against the back, </span><b>creates a stable center of gravity and directs the load downward, rather than backward.</b><span style="font-weight: 400;">. Esto es importante porque si se colocan muy abajo, hace que la mochila se combe y, colocados demasiado alto, hace que se sienta inestable. </span>
<span style="font-weight: 400;">You can use soft items, such as socks or </span><b>socks or clothing, to fill in the spaces and</b> <b>and create cushioning</b><span style="font-weight: 400;"> between bulky items.</span>
<b>Do you carry liquid fuel?</b><span style="font-weight: 400;"> In this case, use only approved fuel bottles and make sure that the cap is tightly closed. Pack it upright and down (separate) from the food, so that, in case of a spill, food will not be contaminated. </span>
<h2><strong>Upper Zone</strong></h2>
<span style="font-weight: 400;">On top of everything else, we place the </span><b>essential elements to use on the trails</b><span style="font-weight: 400;">s:</span>
<ul>
<li style="font-weight: 400;" aria-level="1"><span style="font-weight: 400;">Waterproof jacket.</span></li>
<li style="font-weight: 400;" aria-level="1"><span style="font-weight: 400;">Warm jacket.</span></li>
<li style="font-weight: 400;" aria-level="1"><span style="font-weight: 400;">First aid kit.</span></li>
<li style="font-weight: 400;" aria-level="1"><span style="font-weight: 400;">Water filter or purifier.</span></li>
<li style="font-weight: 400;" aria-level="1"><span style="font-weight: 400;">Toilet kit (paper/wet wipes, personal trash bag, dustpan).</span></li>
</ul>
<span style="font-weight: 400;">Depending on the weather and the itinerary, the tent can also be stored in this part, for quick access if a storm arrives earlier than planned.</span>
<h2><strong>Accessory pockets</strong></h2>
<span style="font-weight: 400;">All backpacks have several pockets: on the lid, front, sides and on the lumbar belt. They are used </span><b>to organize the smallest essentials</b><span style="font-weight: 400;">:</span>
<ul>
<li style="font-weight: 400;" aria-level="1"><span style="font-weight: 400;">Chart and compass.</span></li>
<li style="font-weight: 400;" aria-level="1"><span style="font-weight: 400;">Electronics.</span></li>
<li style="font-weight: 400;" aria-level="1"><span style="font-weight: 400;">Sunglasses.</span></li>
<li style="font-weight: 400;" aria-level="1"><span style="font-weight: 400;">Sunscreen and lipstick.</span></li>
<li style="font-weight: 400;" aria-level="1"><span style="font-weight: 400;">Headlamp.</span></li>
<li style="font-weight: 400;" aria-level="1"><span style="font-weight: 400;">Repellent.</span></li>
<li style="font-weight: 400;" aria-level="1"><span style="font-weight: 400;">Lunch on the go.</span></li>
<li style="font-weight: 400;" aria-level="1"><span style="font-weight: 400;">Water bottles.</span></li>
<li style="font-weight: 400;" aria-level="1"><span style="font-weight: 400;">Rain cover (if you don't have a rain cover, bag the entire contents of the backpack).</span></li>
<li style="font-weight: 400;" aria-level="1"><span style="font-weight: 400;">Car keys (there is usually a clip inside one of the pockets).</span></li>
<li style="font-weight: 400;" aria-level="1"><span style="font-weight: 400;">Documentation.</span></li>
</ul>
<h2><strong>Tool loops and tie-down points</strong></h2>
<span style="font-weight: 400;">Some backpack models have loops and lashing points to carry objects and tools </span><b>to carry objects and tools, such as</b><span style="font-weight: 400;">such as:</span>
<ul>
<li style="font-weight: 400;" aria-level="1"><span style="font-weight: 400;">Trekking poles.</span></li>
<li style="font-weight: 400;" aria-level="1"><span style="font-weight: 400;">Tent poles.</span></li>
<li style="font-weight: 400;" aria-level="1"><span style="font-weight: 400;">Insulation for sleeping.</span></li>
<li style="font-weight: 400;" aria-level="1"><span style="font-weight: 400;">Piqueta.</span></li>
<li style="font-weight: 400;" aria-level="1"><span style="font-weight: 400;">Crampons.</span></li>
<li style="font-weight: 400;" aria-level="1"><span style="font-weight: 400;">Rope.</span></li>
</ul>
<span style="font-weight: 400;">The </span><b>daisies and compression straps</b><span style="font-weight: 400;"> can also be used to hold equipment that cannot be carried elsewhere.</span> <span style="font-weight: 400;">However, always minimize the amount of </span><b>minimize the number of items you carry on the outside of your backpack, as they can snag on branches or scrape against rocks.</b><span style="font-weight: 400;">They can snag on branches or scrape against rocks. </span>
Assemble your backpack efficiently, it can hold an incredible amount of gear, but it is also important that its distribution is balanced and does not move when you walk. that its distribution is balanced and that it doesn’t move when you walk..The mochi can be divided into three zones and peripheral storage:
Lower area: ideal for bulky equipment and items not needed until camp.
Central zone: good for dense and heavy equipment. The closer the weight is to the back, the better the balance.
Upper zone: Recommended for essential items you may need on the road.
Pockets for accessories: the ones you need frequently and in an emergency.
Loops for tools and lashing points: For large or long equipment, such as trekking poles.
The idea is to fill the nooks and crannies until you have a solid, stable load with equally and stable load, with the weight equally balanced on each side.. Una vez llena, se ajustan las correas de compresión, para optimizar la carga y evitar que se mueva mientras caminás.
Lower zone
Here are the bulky items you don’t need to use until camp.. Por ejemplo:
Sleeping bag (backpacks usually have a bottom compartment designed for this).
Layer you plan to sleep in.
Lightweight camping footwear.
Packing this type of soft equipment on the bottom creates an internal shock absorption system for the back and backpack.
Central zone
In this part, you put the heavy equipment that you are not going to use during the trekking.. Incluye:
Meals planned for camping or later days.
Kitchen kit.
Fuel.
Camel bag (sachet-type water tank).
Tent body and roof cover.
Extra clothing.
Pack heavy items in this area and against the back, creates a stable center of gravity and directs the load downward, rather than backward.. Esto es importante porque si se colocan muy abajo, hace que la mochila se combe y, colocados demasiado alto, hace que se sienta inestable.
You can use soft items, such as socks or socks or clothing, to fill in the spaces andand create cushioning between bulky items.
Do you carry liquid fuel? In this case, use only approved fuel bottles and make sure that the cap is tightly closed. Pack it upright and down (separate) from the food, so that, in case of a spill, food will not be contaminated.
Upper Zone
On top of everything else, we place the essential elements to use on the trailss:
Waterproof jacket.
Warm jacket.
First aid kit.
Water filter or purifier.
Toilet kit (paper/wet wipes, personal trash bag, dustpan).
Depending on the weather and the itinerary, the tent can also be stored in this part, for quick access if a storm arrives earlier than planned.
Accessory pockets
All backpacks have several pockets: on the lid, front, sides and on the lumbar belt. They are used to organize the smallest essentials:
Chart and compass.
Electronics.
Sunglasses.
Sunscreen and lipstick.
Headlamp.
Repellent.
Lunch on the go.
Water bottles.
Rain cover (if you don’t have a rain cover, bag the entire contents of the backpack).
Car keys (there is usually a clip inside one of the pockets).
Documentation.
Tool loops and tie-down points
Some backpack models have loops and lashing points to carry objects and tools to carry objects and tools, such assuch as:
Trekking poles.
Tent poles.
Insulation for sleeping.
Piqueta.
Crampons.
Rope.
The daisies and compression straps can also be used to hold equipment that cannot be carried elsewhere.However, always minimize the amount of minimize the number of items you carry on the outside of your backpack, as they can snag on branches or scrape against rocks.They can snag on branches or scrape against rocks.
One of the most frequent questions we receive is: How much should my backpack weigh? Many factors influence the determination of the weight of the backpack, which makes it difficult to give an exact weight recommendation for each person. To answer this question we are going to talk to you from our personal experience and our professional training.
<span style="font-family: impact, sans-serif; font-size: 18pt;">Backpack for trekking and hiking</span>
To define the weight of a trekking or hiking backpack, we can use these basic and very general guidelines:
<ul>
<li>A loaded backpack should not weigh more than 20% of your body weight.</li>
<li>A day hiking backpack should weigh no more than 10% of your body weight.</li>
</ul>
Using body weight percentages as a guide will help you keep your pack at a manageable weight adapted to your own capacity. But it doesn't work in all situations, small people often end up carrying more than 20% of their weight, and activities that require technical equipment can significantly influence the equation. Now, there are factors external to our body that play an important role in the total weight of the <em>mochi</em>:
<ul>
<li><strong>Trip length</strong>: the longer your trip, the more food, water and fuel you will need to carry, which of course adds weight to your pack. Even on multi-day itineraries, you'll want your pack to be close to 20% of your body weight, so we need to be careful with the gear and clothing we carry to compensate for all that extra weight. </li>
<li><strong>Season / weather</strong>: if you are going out in cold temperatures, you will need warmer and heavier clothing and equipment than if you were trekking in sunny summer weather.</li>
<li><strong>Personal preferences</strong>: Some people value comfort in camp and are willing to accept the inherent weight that comes with carrying<em>"luxuries"</em> such as a hammock, extra clothing, or an inflatable mattress. Others are fine with wearing the same clothes for days and sleeping on an ultra-light insulator. </li>
</ul>
It is not easy, especially when we are just taking our first steps, to know how to reduce the weight of our backpack.
<span style="font-family: impact, sans-serif; font-size: 18pt;">Y... How do we reduce weight?</span>
Most adventurers find value in carrying less weight: it helps to travel faster, farther and more comfortably. When choosing what to carry in the backpack it is essential not to compromise our well-being, a first aid kit is a good example of an item that we do not have to leave at home to reduce weight. Certainly, we can choose lighter versions of these items, but do not omit them altogether. It is also important to think about our adventure partners and not rely on them for extra food or an extra layer of warmth. Having said that, here are some suggestions: <b>Know</b><strong> your base weight</strong>: Base weight is how much your loaded pack weighs, minus "consumables" such as food, water and fuel. Those amounts vary from trip to trip and will decrease throughout the trip as we eat, drink and cook. But everything else that goes in the backpack, such as the tent, sleeping bag, heater and kettle, <em>clothing</em>..., will not change much from trip to trip. Knowing our base weight provides us with a constant number to work on to reduce weight. "Generally" you are considered ultralight ($$$) if your base weight is less than 4.5 kg and light ($$$) if your base weight is less than 9 kg. Most of us mortals ($$) have a base weight of less than 13 kg. <strong>Weigh your equipment </strong>(for obsessives only): Use a kitchen scale and/or luggage scale to weigh all your current gear - this includes everything from your thermal interiors to the tent separated by poles, body and over-roof. Recording weights on a spreadsheet is useful for comparing items when planning, it even allows us to try different base weight configurations depending on the needs of each outing, a backpack for a high altitude expedition may involve a very different base weight to the trekking and hiking backpacks described above. Over the years you'll probably have a handful of items for similar uses, such as two down jackets, and knowing the exact weight of each thing can help you decide which to take and which to leave behind. <strong>The Big 3</strong>: Most of the base weight of the pack is in: the pack itself, the sleeping bag, and the tent. These three fundamental pieces of our equipment are usually expensive, paying special attention to the features offered by each brand and model will help us to find the best equation between weight, our needs and our budget.
<em>A great resource for comparing and reading reliable equipment reviews that I frequently use is www.outdoorgearlab.com.</em>
<b>Plan</b><strong> your meals</strong>: Who hasn't run off to the mountains and grabbed a pile of food before heading out the door? It's the best way to end up with back pain. Taking the time to plan your menu will prevent an unreasonable amount of food from ending up in your backpack. A reasonable target is 700 gr to 1.1 kg of food (or 2500 to 4500 calories) per person per day, depending on your size, weight and the level of effort to be made. It is advisable to carry a little extra food. <b>Re-pack</b>: Do we need a giant tube of toothpaste for a weekend trip? What about the cardboard box of ready rice we eat upstairs? Repacking is an easy way to save weight. Small reusable travel packs can be used for toothpaste and sunscreen. As for food, <span style="color: #000000;">instead of carrying the original packaging with all the contents, it can be divided according to what we need in Ziploc-type bags, they are small, simple, lightweight and reusable.</span> <span style="color: #ffcc00;"><span style="color: #000000;">Freeze-dried food should not be repackaged and should be transported as it comes.</span></span> Finally, we can dispense with individual packs or complementary items of our equipment that add unnecessary weight to the backpack. These objects are, for example, the bag to store the tent or the stakes, if we know beforehand that we are not going to use them. <strong>Create the equipment list for your trip</strong>: C
<span style="color: #000000;">aving a gear list when you are setting up your mochi helps you to take only what you really need and not forget anything. We should avoid carrying single-use items, for example an inflatable pillow. We can easily use our warm jacket to achieve the same comfort without increasing the weight. </span>
<span style="font-family: impact, sans-serif; font-size: 18pt;">To assemble the mochi!</span>
No matter how light your gear is, cramming things into your pack haphazardly or leaving items "dangling" on the outside is likely to result in an awkward and unstable load. There is a method for keeping your pack balanced and secure, but that's the subject of another article: <a href="https://www.huka.com.ar/en/how-to-assemble-the-backpack/">Assembling your backpack</a>.
One of the most frequent questions we receive is: How much should my backpack weigh? Many factors influence the determination of the weight of the backpack, which makes it difficult to give an exact weight recommendation for each person. To answer this question we are going to talk to you from our personal experience and our professional training.
Backpack for trekking and hiking
To define the weight of a trekking or hiking backpack, we can use these basic and very general guidelines:
A loaded backpack should not weigh more than 20% of your body weight.
A day hiking backpack should weigh no more than 10% of your body weight.
Using body weight percentages as a guide will help you keep your pack at a manageable weight adapted to your own capacity. But it doesn’t work in all situations, small people often end up carrying more than 20% of their weight, and activities that require technical equipment can significantly influence the equation. Now, there are factors external to our body that play an important role in the total weight of the mochi:
Trip length: the longer your trip, the more food, water and fuel you will need to carry, which of course adds weight to your pack. Even on multi-day itineraries, you’ll want your pack to be close to 20% of your body weight, so we need to be careful with the gear and clothing we carry to compensate for all that extra weight.
Season / weather: if you are going out in cold temperatures, you will need warmer and heavier clothing and equipment than if you were trekking in sunny summer weather.
Personal preferences: Some people value comfort in camp and are willing to accept the inherent weight that comes with carrying“luxuries” such as a hammock, extra clothing, or an inflatable mattress. Others are fine with wearing the same clothes for days and sleeping on an ultra-light insulator.
It is not easy, especially when we are just taking our first steps, to know how to reduce the weight of our backpack.
Y… How do we reduce weight?
Most adventurers find value in carrying less weight: it helps to travel faster, farther and more comfortably. When choosing what to carry in the backpack it is essential not to compromise our well-being, a first aid kit is a good example of an item that we do not have to leave at home to reduce weight. Certainly, we can choose lighter versions of these items, but do not omit them altogether. It is also important to think about our adventure partners and not rely on them for extra food or an extra layer of warmth. Having said that, here are some suggestions: Know your base weight: Base weight is how much your loaded pack weighs, minus “consumables” such as food, water and fuel. Those amounts vary from trip to trip and will decrease throughout the trip as we eat, drink and cook. But everything else that goes in the backpack, such as the tent, sleeping bag, heater and kettle, clothing…, will not change much from trip to trip. Knowing our base weight provides us with a constant number to work on to reduce weight. “Generally” you are considered ultralight ($$$) if your base weight is less than 4.5 kg and light ($$$) if your base weight is less than 9 kg. Most of us mortals ($$) have a base weight of less than 13 kg. Weigh your equipment (for obsessives only): Use a kitchen scale and/or luggage scale to weigh all your current gear – this includes everything from your thermal interiors to the tent separated by poles, body and over-roof. Recording weights on a spreadsheet is useful for comparing items when planning, it even allows us to try different base weight configurations depending on the needs of each outing, a backpack for a high altitude expedition may involve a very different base weight to the trekking and hiking backpacks described above. Over the years you’ll probably have a handful of items for similar uses, such as two down jackets, and knowing the exact weight of each thing can help you decide which to take and which to leave behind. The Big 3: Most of the base weight of the pack is in: the pack itself, the sleeping bag, and the tent. These three fundamental pieces of our equipment are usually expensive, paying special attention to the features offered by each brand and model will help us to find the best equation between weight, our needs and our budget.
A great resource for comparing and reading reliable equipment reviews that I frequently use is www.outdoorgearlab.com.
Plan your meals: Who hasn’t run off to the mountains and grabbed a pile of food before heading out the door? It’s the best way to end up with back pain. Taking the time to plan your menu will prevent an unreasonable amount of food from ending up in your backpack. A reasonable target is 700 gr to 1.1 kg of food (or 2500 to 4500 calories) per person per day, depending on your size, weight and the level of effort to be made. It is advisable to carry a little extra food. Re-pack: Do we need a giant tube of toothpaste for a weekend trip? What about the cardboard box of ready rice we eat upstairs? Repacking is an easy way to save weight. Small reusable travel packs can be used for toothpaste and sunscreen. As for food, instead of carrying the original packaging with all the contents, it can be divided according to what we need in Ziploc-type bags, they are small, simple, lightweight and reusable.Freeze-dried food should not be repackaged and should be transported as it comes. Finally, we can dispense with individual packs or complementary items of our equipment that add unnecessary weight to the backpack. These objects are, for example, the bag to store the tent or the stakes, if we know beforehand that we are not going to use them. Create the equipment list for your trip: C
aving a gear list when you are setting up your mochi helps you to take only what you really need and not forget anything. We should avoid carrying single-use items, for example an inflatable pillow. We can easily use our warm jacket to achieve the same comfort without increasing the weight.
To assemble the mochi!
No matter how light your gear is, cramming things into your pack haphazardly or leaving items “dangling” on the outside is likely to result in an awkward and unstable load. There is a method for keeping your pack balanced and secure, but that’s the subject of another article: Assembling your backpack.